• Skip to primary navigation
  • Skip to main content
  • Skip to primary sidebar
  • Skip to footer
Alexander Training personal trainer Austin Texas

Alexander Training - personal training in Austin, Texas

Personal training in Austin, Texas and customized strength programs in Austin, Texas.

  • Home
  • About Kathryn Alexander
  • Blog
  • Success Stories
  • Training Programs
  • Start Today

Home gyms

Dumbbell Arm Workout At Home

January 13, 2025 by Kathryn Alexander

Doing a dumbbell arm workout at home can be simple and effective. Notice I didn’t say easy, but simple. You just need a pair of dumbbells, some lighter weights and maybe some heavier weights.

You don’t need fancy machines or big equipment that takes up a lot of floor space. Regardless of fitness level, you can get a lot done with even just one set of dumbbells.

Dumbbell arm workout at home with Kathryn Alexander

With a few weights and a lot of focus, you can develop aesthetically pleasing and strong arms right from home.

Read on for 10 of the best dumbbell arm exercises.

Biceps and Triceps Exercises

Note that I am referring to true arm work, which involves the biceps brachii and triceps brachii. Most of these movements are biceps curls, and triceps extensions. They will work the forearm muscles, but are primarily for the upper arms. Additionally, this is not a full upper body workout. I am not referring to all the major upper body muscle groups, so I won’t be listing my favorite back chest or shoulder exercises. Bench press, pulldowns, etc, will all be covered in another post. This is just arms.

Ok grab your dumbbells! Here we go! 

Top 5 Dumbbell Biceps Exercises

  1. Dumbbell Biceps Curl – A classic exercise for the biceps. Hold a dumbbell in each hand and curl the weights towards your shoulders.
  2. Hammer Curl – Similar to bicep curls, but with your palms facing each other, working the brachialis muscle and forearms more.
  3. Concentration Curl – Seated with your elbow resting on your thigh, curl one dumbbell at a time to focus deeply on the biceps.
  4. Incline Dumbbell Curl – Lie back on an incline bench and curl the dumbbells. This variation adds a deeper stretch to the biceps.
  5. Zottman Curl – Curl the dumbbells up with a standard bicep curl, then rotate your wrists to a pronated grip (palms down) at the top before lowering. This targets both the biceps and forearms.

Top 5 Dumbbell Triceps Exercises

  1. Overhead Dumbbell Triceps Extension – Hold a dumbbell overhead with both hands and lower it behind your head, extending it back up to work the triceps.
  2. Dumbbell Triceps Kickback – Bend at the hips and extend your arm behind you while holding a dumbbell to isolate the triceps.
  3. Close-Grip Dumbbell Press – Similar to a chest press, but with your hands close together to engage the triceps more.
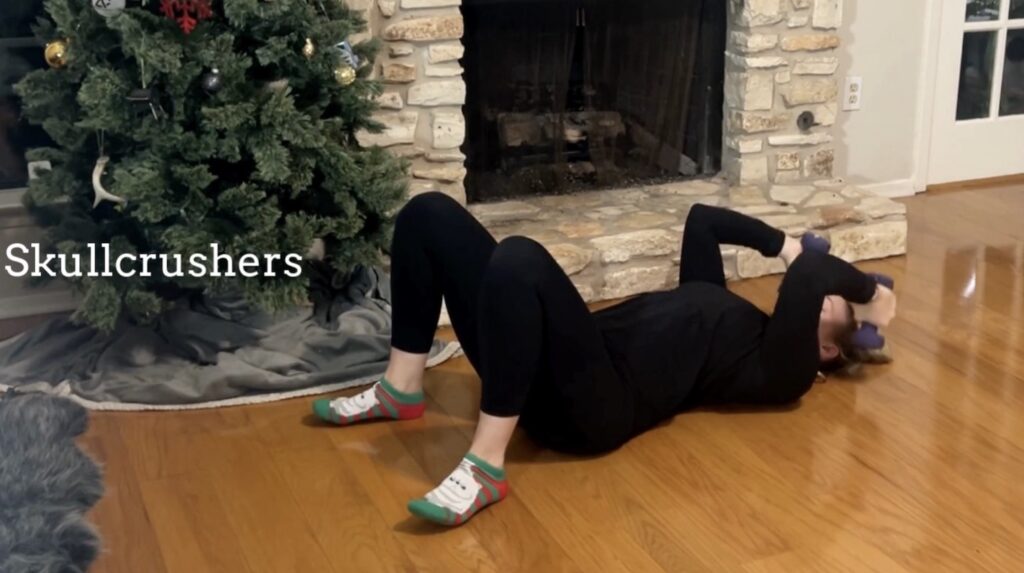
  4. Dumbbell Skull Crushers – Lie flat on a bench and lower the dumbbells towards your forehead, keeping your elbows steady to focus on the triceps.
  5. Dumbbell Tate Press – Lying on a bench, hold the dumbbells with your palms facing forward and lower them towards your chest, then press up.

Biceps Exercises:

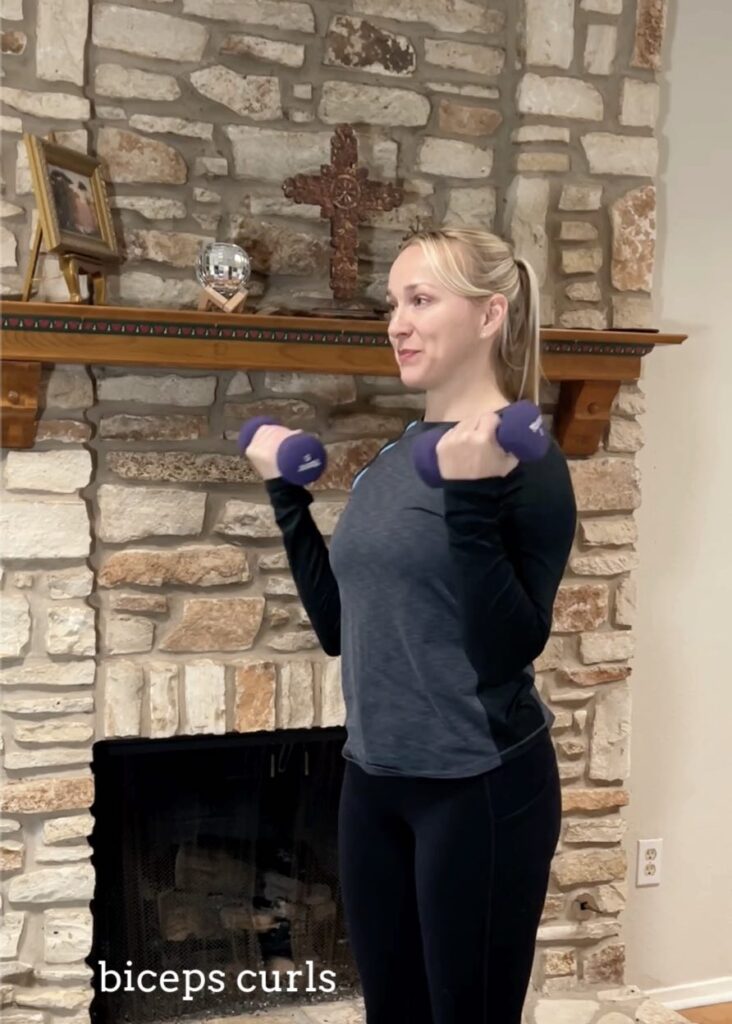
  1. Dumbbell Biceps Curl:
    • How to do it: Stand with a dumbbell in each hand, arms fully extended, and palms facing forward. Keep your elbows close to your torso and curl the dumbbells up towards your shoulders. Squeeze your biceps at the top, then slowly lower the weights back down to the starting position. If you’re standing, keep your feet shoulder-width apart and knees not locked out, slight bend.
    • As you do curls, think about using your latissimus dorsi (back) and other back/chest musculature to stabilize your shoulder joint and shoulder blades. In other words, don’t be swinging your shoulder all over the places to get the dumbbell moved.​
    • (There’s a joke meme that says, “any exercise can be a lower back exercise if you do it wrong enough!” 😂 don’t make this a lower back exercise! Learn how to do it well before you try to break the rules).
    • Muscles targeted: This exercise isolates the biceps brachii, the large muscle in the front of the upper arm, and engages the brachialis and brachioradialis for stabilization.
  2. Hammer Curl:
    • How to do it: Hold the dumbbells at your sides with your palms facing your torso. Curl the weights as you would in a regular curl but keep your palms in a neutral position (facing each other) throughout the movement. Slowly lower the dumbbells to the starting position. Same standing positioning as I mentioned above where you can and hip with or feet hip-width.
    • Muscles targeted: This movement emphasizes the brachialis, a muscle underneath the biceps, helping to add thickness to the arm. It also engages the brachioradialis in the forearm.
  3. Concentration Curl:
    • How to do it: Sit on a bench with your legs spread apart. Hold a dumbbell in one hand and rest your elbow on the inside of your thigh. Curl the dumbbell towards your shoulder, concentrating on squeezing the biceps at the top of the movement, and lower it slowly. If you stabilize well, you can really see how this is considered one of the most common isolation exercises.
    • Muscles targeted: This highly focused curl isolates the biceps brachii, minimizing the involvement of other muscles to help build peak contraction strength and enhance bicep definition.
  4. Incline Dumbbell Curl:
    • How to do it: Sit on an incline bench with your back fully supported and hold a dumbbell in each hand, allowing your arms to hang straight down. Curl the weights towards your shoulders, keeping your elbows tight to your body, and slowly lower them back down.
    • Muscles targeted: This exercise stretches the long head of the biceps, allowing for a greater range of motion and engagement. The incline position puts extra tension on the biceps throughout the curl.
  5. Zottman Curl:
    • How to do it: Perform a regular bicep curl by lifting the weights with your palms facing up. At the top, rotate your wrists so your palms face down, and slowly lower the weights in this pronated grip. Reverse the rotation on the way up.
    • Muscles targeted: This curl variation targets both the biceps and the forearms (specifically the brachioradialis), offering a balanced arm workout. The downward portion of the lift strengthens the forearms.
home dumbbell arm workout. Biceps curls with personal trainer Kathryn Alexander

Triceps Exercises:

  1. Overhead Dumbbell Triceps Extension:
    • How to do it: Stand or sit and hold one dumbbell with both hands overhead. Keep your elbows close to your ears, and lower the weight behind your head by bending your elbows. Extend your arms back up to the starting position.
    • Muscles targeted: This exercise targets all three heads of the triceps (long, medial, and lateral), with a particular focus on the long head due to the overhead position.
  2. Dumbbell Triceps Kickback:
    • How to do it: Bend at your hips with your torso nearly parallel to the ground and hold a dumbbell in one hand. Keeping your upper arm stationary and close to your torso, extend your forearm backward until your arm is fully straight. Slowly return to the starting position.
    • Muscles targeted: This movement isolates the triceps, especially the lateral head, and works on elbow extension, which is the primary function of the triceps.
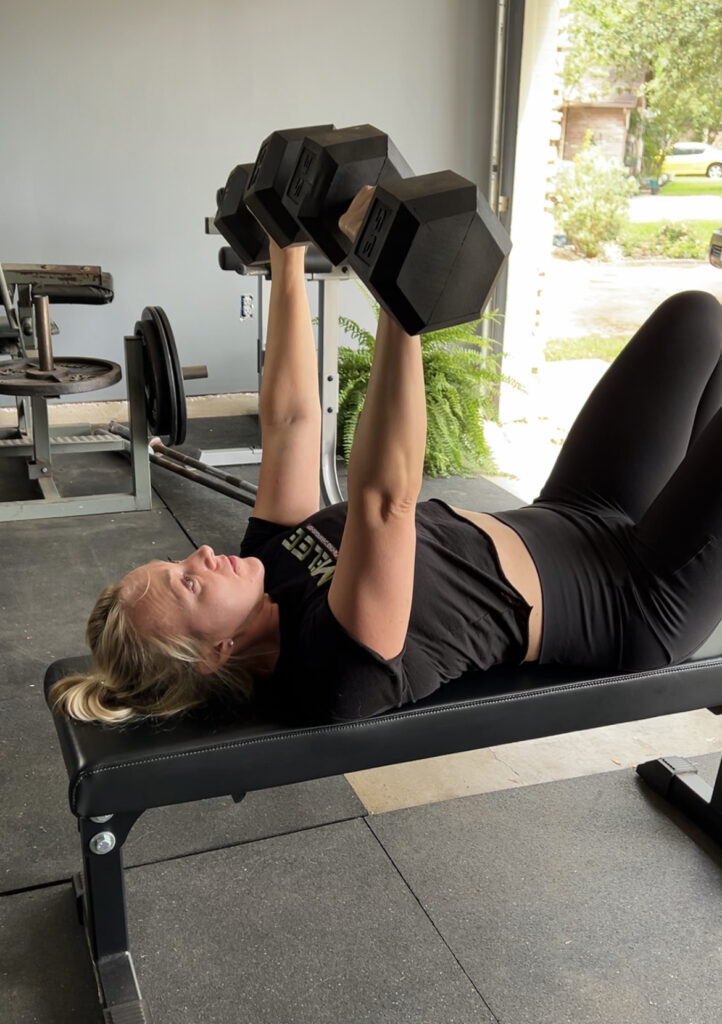
  3. Close-Grip Dumbbell Press:
    • How to do it: Lie on a flat bench holding two dumbbells close together directly over your chest. Lower the weights towards your chest, keeping your elbows tucked in, and then press them back up.
    • Muscles targeted: The close grip emphasizes the triceps more than a regular chest press, particularly engaging the medial and lateral heads, while also working the chest and shoulders as secondary muscles.
  4. Dumbbell Skull Crushers:
    • How to do it: Lie flat on a bench with a dumbbell in each hand. Extend your arms straight up toward the ceiling, then slowly lower the dumbbells towards your forehead by bending your elbows. Extend your arms back up to complete the rep. Your elbows will bend approximately in a 90-degree angle, give or take a few. 
    • Muscles targeted: This exercise targets the triceps brachii, especially the long head, and is excellent for building mass and strength in the upper arms.
  5. Dumbbell Tate Press:
    • How to do it: Lie on a flat bench with a dumbbell in each hand, palms facing forward. Bend your elbows and lower the dumbbells towards your chest while keeping them angled inward. Push them back up to the starting position.
    • Muscles targeted: The Tate Press is an effective isolation exercise for the triceps, emphasizing the medial head and improving overall arm definition.

How to Incorporate These Dumbbell Arm Exercises

First things first, aim for great mind-muscle connection and proper form. With arm work, you’ll sometimes hear people say, “make light weight feel heavy.” This means that you’re focused on the muscular connection and recruiting as many motor units (muscle fibers and they nerves that innervate them) as possible. The lifters who get the best arm workouts are really great at focusing on the muscles, not the movement. 

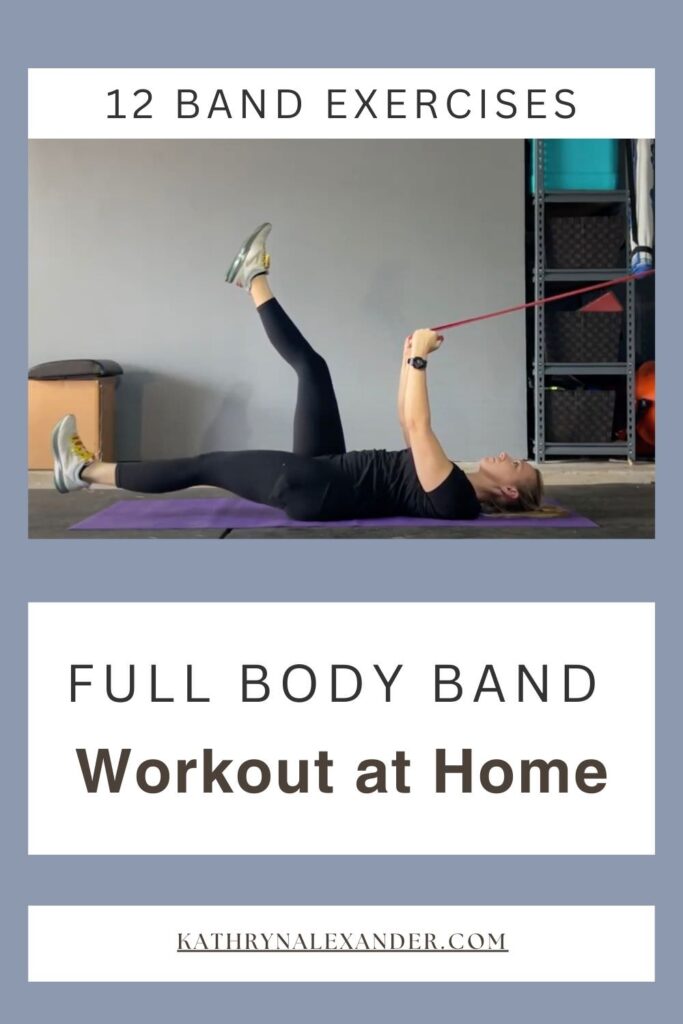
Next, remember to still add in other appropriate strength training for your arms. As you can, add in body weight exercises, resistance bands, and barbell work and machines. 

Remember also to get a full upper body strength program. Add in your chest, back and shoulder work to get your other upper-body muscles. Chest muscles and back muscles need love too, especially if you’re trying to fully develop your upper body.

home dumbbell arm workout. Skullcrushers for triceps with Austin personal trainer Kathryn Alexander

Dumbbell Arm Workout for Home Summary

There you have it! Some of the best dumbbell exercises for a well-rounded workout for your arms, hitting the major muscles and offering a variety of movements to build both strength and muscle tone.

If you are looking for specific shoulder exercises like the shoulder press, front raise, overhead press, lateral raise, check out this blog post for dumbbell shoulder workouts at home. 

Finally, don’t forget to also work lower body. For the best case muscular development and fitness, you’ll want to work your whole body. Here’s a great leg and glute workout that you can do with your home gym. 

Work With Me!

If you are looking for a personal trainer in Austin, I’d love to talk with you! If you are not in Austin, Round Rock, or central Texas, let’s talk about online training.

Message me here for a free consult about personal training in Austin, Texas, or here for online personal training, and we’ll discuss your goals, background, equipment availability, schedule, and exercise preferences.

Let’s get you strong and healthy! 💪

About the author

Kathryn Alexander is a strength coach and personal trainer in Austin, Texas. She loves hiking, college football, and the feel of a perfectly knurled barbell. Read more about Kathryn here.


  • cheap fun things to do in Austin. Barton Springs Pool
    Cheap, Fun Things to Do in Austin, Texas (2025)
  • cable squats muscles worked by Kathryn Alexander Austin personal trainer
    Cable Squats: Muscles Worked and How to do Them
  • semi private personal training Austin Texas
    New Semi Private Personal Training in Austin, Texas!
  • The best workouts for healthy Emma Suttie Kathryn Alexander epoch Times
    The Best Workouts for Health: Contributor for Epoch Times
  • dumbbell back workout Kathryn Alexander Austin personal trainer
    Dumbbell Back Workout: The 5 Best Exercises
  • Dumbbell arm workout at home with Kathryn Alexander
    Dumbbell Arm Workout At Home

Filed Under: Home gyms

How to Heat a Garage Gym: The Best Tips and Equipment

December 11, 2024 by Kathryn Alexander

I am republishing this as of December 2024, because I’m another year in to experimenting on how to heat a garage gym. we are starting to get down into the 30s here in Austin, and it’s enough to make all the dumbbells and barbells cold.

So, let’s get to it: here are the best ways to heat a garage gym this winter.

Some links in this post are Amazon affiliate links to products that I love and regularly use.

Heat Your Garage Gym This Winter!

Whether you live in harsher environments with more extreme weather, or farther south, the cold can present a challenge for your garage gym workouts. This isn’t you being a wuss, either; cold weather changes the game, and it’s good for you to have options on how to heat your space to a more comfortable temperature.

personal trainer Austin Kathryn Alexander
Headlamps are a must for home improvement projects 🙂

To make my winter garage sessions more survivable, I have added insulation to my garage walls behind new sheetrock, I insulated the door, and bought an electric heater. Worth every bit of the investment! I’ll give you all the details below.

Ways to Heat a Garage Gym in Winter

Learning how to heat a garage gym for cold winter weather is one of the best things you can do to continue making progress on your health and strength goals. Don’t skip your garage gym workout because of the cold weather!

There are several heating methods for warming your cold garage gym to a comfortable temperature in the winter months, the best way to warm your home gym this winter. Check them out below. 

Propane Heaters

Propane heaters are one of the most effective options for heating a garage in the cold weather, but they do come with down sides. 

A propane heater will put out a lot of heat and can create warm air in a large space like the whole garage, not just a corner. Most propane heaters are forced air heaters, meaning they propel air out instead of simply heating in a radiant fashion. 

Examples of propane heaters are the torpedo heaters you have probably seen in warehouse style gyms, and at the front of The Home Depot and Lowe’s in cooler months. 

You’ll need a fuel source such as a propane tank if you don’t have a gas line in your garage. 

However, the byproduct of a burning propane is carbon monoxide, so you must have proper ventilation. This part is crucial! 

You must leave the garage doors somewhat open and/or a window partially open to safely operate a propane heater. 

You should also have a carbon monoxide detector. You should have this anyway! But you should especially have it if you are using a propane heater. 

If you go this route, please research it further. It would also be a good idea to consult your local HVAC specialist first. 

If this concerns you, a better option might be a radiant heater.

Radiant Heaters and Infrared Heaters

Radiant heaters are a great heat source during the cold season. They can warm a small space or pocket of a room. Since they only radiate and do not force air out, they heat smaller areas. Infrared heaters are examples of radiant heaters. Infrared heaters can be free standing portable heaters or mounted to the ceiling to save floor space. They heat objects and people instead of heating the air around them. Depending on the size of your garage, radiant heaters might be a great option. 

Electric Heaters

Electric heaters are one of the easiest ways to heat a garage on cold days. I use an electric heater in my garage gym. It is an oil filled space heater which I put it near my squat rack, where I’ll be doing most of the work. It doesn’t dramatically heat the whole garage, but it makes the cold bearable. 

I use a DeLonghi oil filled radiator heater, which is about $100 – $150. Worth it to me. (Affiliate link).

I have two of these, one in my garage gym, and I use one inside too. It makes a room nice and cozy warm without having to raise the heat in the whole house.

You can google “best electric space heaters” to see which fits your space and budget. There will be many options and you should find many that will comfortably heat small garages. 

Mini Split Ductless Heaters

One of the most effective and convenient solutions for heating your garage gym in winter is installing a mini split. A mini split is an electric ductless heating system. They run about $1,000 and will need to be installed by a professional. These might be the best heaters, as they provide both heating and cooling, and are effective enough to combat the most extreme temperatures in cold climates, and fight off the heat in the summer. 

Mini splits will probably come with a fancy little remote control and put out all the hot air you’d like. 

Consider a mini split a complete and full heat and cold solution. It will affect your electric bill more than the smaller heaters and heating solutions, but it will be a permanent solution that will last a long time.

Other Ways to Heat a Garage Gym

There are of course other ways to heat a garage gym, including a wood stove, pellet stove or natural gas heaters. These are less convenient in a garage and more suitable for finished rooms. You would of course have to take care with these, as they have open flame. Generally I would suggest the above solutions before you use a wood or pellet stove, but if you have experience with these and can tell me otherwise, please let me know! I have admittedly lived pretty far south my whole life, and the portable electric heaters have been plenty for me. 

Insulation for Walls, Doors and Floors of Garage Gyms

One of the most effective, easy and cost saving ways to keep the cold air out is to ensure your garage is well insulated. Proper insulation on the walls, doors and floors can go a long way in holding heat in and reducing the cost of heating the garage. 

And, speaking of essentials, here are some home gym equipment essentials.

Floor Insulation

Concrete floors become brutally cold in the winter, bringing all that cold in via the floor. Laying down a solid flooring foundation is smart for any gym, for safety, preservation of your floor and sport performance.

One often overlooked benefit is that a thick floor covering will help with insulation. I recommend horse stall mats like the ones that can be found at Tractor Supply. These are 3/4 – 1” thick and do a great job of buffering the temperature of the cold floor.

You might want different thicknesses if you’re using your garage gym for different purposes. Here are more factors to consider when you are deciding how thick your gym flooring needs to be.

floors mats for heat retention in garage
Approximately 12 floor mats cover my garage gym floor to cushion and protect the floor, and insulate.

In the harsher winter of colder climates, some people elect to heat their garage floor. This is a more expensive and comprehensive solution, as it involves installing the heating elements into the floor. If you are considering this, do further research in finding reputable companies who specialize in heating floors.

Wall Insulation

If you are renovating the garage walls and have the opportunity to install sheet insulation, take it. That will help tremendously to keep heat from escaping in the winter. The Home Depot gives a great idea of what kind of insulation level you need, including R-values by region of the US.  Check this out if you are adding insulation. 

How to heat a garage gym and use insulation to retain heat
This is the fiberglass I used in the garage gym walls, and you can see the garage door insulation packed into the panels.
fiberglass insulation in garage gym walls
Fiberglass insulation in the garage gym walls, trimmed to fit between studs.

If you aren’t redoing the walls anytime soon, the next best thing is to insulate the garage door. 

Garage Door Insulation

There are several ways to insulate an existing garage door. The two most common are fiberglass insulation, which comes in blankets, and foam panel insulation. I bought a garage door insulation kit with sheets of fiberglass insulation and installed it myself. It was around $200 from Home Depot for my two garage doors, and was fairly easy to do. It required fitting the insulation between the garage door panels, sealing the edges with tape clips. 

Garage door insulation for heating garage gym in winter.
Garage door insulation for heating my garage gym in winter. Excuse the markups.

I have since learned that this can get heavy because of accumulation of moisture in the fiberglass insulation, so foam panels might be a better option. Again, contact a trusted HVAC professional to help you make the right decision. Foam panel insulation also looks a bit sharper.

I don’t regret my insulation at all, and it’s effective. But, I might do it differently in the future to heat my next garage gym.

Finally, you can add weatherstripping or seal to the bottom of your garage door if you have large gaps that allow heat loss.

Related: Top 10 Benefits of a Home Gym

Dress for Cold Weather

The last thing you can do, which doesn’t involve modifying your garage, is dressing yourself for the cold weather. Invest in cold gear in layers: a base layer, an insulating layer, and an outer layer. I swear by REI merino wool socks, and thermal middle layers. 

To be fully honest with you, you need to ask your cold weather friends or google how to dress for winter weather. I do not know how, and my strategy is to avoid harsh winters. I’ve been skiing once and boy, was it a bad time. 

I was cold cold! I try every year to find better gear, but I still get cold, which is the reason I have added insulation behind my sheet rock, the garage door insulation, and a heater to my garage. 

Read also my favorite home gym organization ideas and storage solutions.

Make a Plan for Cold Weather Lifting

Make a cold weather plan so you continue getting your lifting in this winter. By adding a bit of weather stripping, insulation, and investing in the right type of heater, you can create a comfortable environment. 

You can also be strategic by warming up inside to begin the warming up/sweating process, and moving to the garage while it has had to for you, and it, to warm up.

In summary, to keep warm in your garage gym in the cold winter:

  • Identify leaks in your garage
  • Add weather stripping and insulation
  • Purchase a good heater for your space
  • Dress in layers in cold weather gear
  • Start your heater in the garage gym
  • Warm up inside
  • Go dominate your training session!

Cold Weather Not For You?

Join me in a heated gym with infrared saunas! You can’t always out run the cold. If this is the case for you, do the next best thing and meet me at Big Tex Gym in Austin, Texas for some climate controlled personal training! 

Check out these training options here and let me know how I can help you!

About the author

Kathryn Alexander is a strength coach and personal trainer in Austin, Texas. She loves hiking, college football, and the feel of a perfectly knurled barbell. Read more about Kathryn here.


  • cheap fun things to do in Austin. Barton Springs Pool
    Cheap, Fun Things to Do in Austin, Texas (2025)
  • cable squats muscles worked by Kathryn Alexander Austin personal trainer
    Cable Squats: Muscles Worked and How to do Them
  • semi private personal training Austin Texas
    New Semi Private Personal Training in Austin, Texas!
  • The best workouts for healthy Emma Suttie Kathryn Alexander epoch Times
    The Best Workouts for Health: Contributor for Epoch Times
  • dumbbell back workout Kathryn Alexander Austin personal trainer
    Dumbbell Back Workout: The 5 Best Exercises
  • Dumbbell arm workout at home with Kathryn Alexander
    Dumbbell Arm Workout At Home

As an Amazon Associate I earn from qualifying purchases.

Filed Under: Home gyms

How Much Does a Barbell Weigh?

November 5, 2024 by Kathryn Alexander

How much does a barbell weigh? There’s a short answer and a long answer, and I’ll tell you both.

(Nerd alert, I’m going to get in the weeds about barbells here! I love barbells. I collect barbells. I had a dream I had 7 more barbells as I was writing this post lol)

  • Short answer: 45 pounds, or 20 kilograms. 
  • Long answer: 10 pounds, 15 pounds, 35 pounds, 10 kilos, 20 kilos, 45 pounds, 70 pounds, and more. 

If you’ve ever been new in a gym, you know you have to familiarize yourself with the equipment. You’ll usually see what you consider standard barbells, and you can assume they weight 45 pounds. Most barbells do. But, there are so many specialty bars, and it seems like there are more being made every day. They’re pretty fun, too! If you’re lucky, you’re in a gym that has many of these barbells, so you can play with them all. 

Gym Cat and barbell during garage gym workout
Gym Cat and barbell during garage gym workout. For reference, the bar is loaded to 95 and Cat weights about 14 pounds here.

Check out this guide so that you can distinguish different types of bars and know the weight of the barbell you’ll be training with.

How Much Does a Standard Barbell Weigh?

As I mentioned above, the most common barbell weighs 45 pounds, which is about 20 kilograms. Twenty kilograms equals 44.1 pounds, but most everybody says 45. Most Olympic barbells and power bars weigh this. If you’re in commercial gyms or mainstream big box gyms, this is probably what you’ll encounter. Unless it is notably different in size or is marked, you can probably safely assume a bar is 45 pounds. 

Note that sometimes a bar is called a standard bar, and this is the skinny bar that you can buy from Academy or Dick’s Sporting Goods. These have a small diameter and don’t weight 45.

When you hear people colloquially say “standard bar”, it usually means what is generally found in gyms. Those are 45 pounds.

Marking Barbells

You’ll see that some gyms mark barbells with different colored tape on the collars. This helps distinguish which bar is which. I don’t think there is a standard across gyms in America for barbells colors, but please correct me if I’m wrong. 

For example, at Big Tex Gym where I train my clients now, the squat bar is labeled in yellow tape. The deadlift bars are labeled red, power barbells are labeled blue. Bent or damaged bars are labeled with gray. These are nice to keep around too, in case you are doing rack pulls or other lifts that are hard on the bar. This way you can use the gray bar and not ruin a $850 Eleiko. 

How Much Does a Barbell Weigh? Olympic and power bars

If you’re doing a heavy bench press or squat though, you do NOT want the bar to rotate in your hand because you unknowingly loaded up a bent bar. This is also why I chase down people who are abusive to bars in the gym. If I’ve done that to you, sorry not sorry. 

Different Types of Barbells

There are sooo many different types of barbells! I LOVE this, because it’s cool for the barbell to fit your specific lift and your specific goals. There are squat bars, deadlift bars, training bars, cambered and bent bars, bars in other atypical shapes, and many more. They began as a straight metal bar, but there are so many variations now! Each of these bars has a different purpose and was created for a specific reason. It makes sense to know the use of a bar and the weight of a barbell before you get started training with it.

Olympic Barbells

A standard Olympic barbell is 45 pounds, typically has knurling for your grip but no center knurling, and spins really well. This is crucial for the Olympic lifts, since the clean requires the bar come into contact with the skin around the collarbones, neck and shoulders. An exception to this weight is that women’s bars for Olympic lifting are 15 kilos, which is about 33 pounds. Women’s bars are a bit thinner diameter too (25mm verses the men 28mm), which allows people with smaller hands to grip it better. Women can choose to train with a standard weight bar, but should train with the women’s barbell if they are training to compete. The International Weightlifting Federation uses women’s bars in all competitions.

Powerlifting Barbells

A straight barbell with good knurling, a power bar is probably the most common type of barbell outside of just regular barbells that are sold en masse from Amazon, etc. Power bars have great knurling both for grip, and center knurling for back squats. 

To my knowledge, no powerlifting federations use different bars for men and women. The International Powerlifting Federation, USA Powerlifting (USAPL), and others do not use gender specific bars. 

Here’s a list of various types of barbells commonly found in gyms and their uses:

1. Olympic Barbell

  • Weight: 20 kg (44 lbs) for men, 15 kg (33 lbs) for women.
  • Length: Typically 7 feet (84 inches).
  • Use: Designed for Olympic weightlifting movements like the snatch and clean & jerk. The barbell has rotating sleeves for smoother lifts. It should go with out saying, but Olympic-style lifts should be performed with Olympic bars and Olympic plates.
  • Features: Knurling for grip, whip (flexibility), and rotating sleeves for dynamic lifts.

2. Powerlifting Barbell

  • Weight: Typically 20 kg (44 lbs).
  • Use: A power bar is specifically for the big three lifts in powerlifting—squats, deadlifts, and bench presses.
  • Features: Stiffer (less whip), more aggressive knurling, and usually no rotating sleeves (or less rotation).

3. Trap Bar / Hex Bar

  • Weight: Typically 45-70 lbs, depending on the model.
  • Use: Primarily used for deadlifts, shrugs, and farmer’s carries. The lifter stands inside the bar, allowing for a more neutral grip and upright posture during lifts. This makes the deadlift a bit less of a hinge, and slightly more like a squat. This uses your lower back a little less since you won’t have to hinge as much. Some people find they can use heavier weights here too.
  • Features: Hexagonal or trapezoidal shape with handles on either side. There are many different manufacturers of these and they all have a unique shape.

4. EZ Curl Bar

  • Weight: Typically 10-15 lbs.
  • Use: Primarily used for biceps curls, triceps extensions, and other arm exercises. The wavy design of ez-curl bars reduces strain on wrists.
  • Features: Shorter length and wavy shaft. The EZ bar is easy to grip. Since it’s not as long, it doesn’t hold as much weight. That’s typically not a limitation on biceps curls, though.

5. Swiss Bar (Multi-Grip Bar, Football bar)

  • Weight: Typically 35-55 lbs.
  • Use: Allows for multiple neutral grip positions, used for pressing movements (bench press, overhead press), and rows. Great for reducing stress on shoulders and wrists. This is pretty much a press and bench press bar. You won’t do lower body lifts with this.
  • Features: Multiple parallel handles for different grip options. 
Football bar and rack belonging to Kathryn Alexander, Austin personal trainer

6. Safety Squat Bar

  • Weight: Typically 60-70 lbs.
  • Use: Designed for squatting, especially for those with shoulder mobility issues. The bar has padded shoulder rests and handles for easier squatting without shoulder strain.
  • Features: The weight distribution is more forward, making the squat more quad-dominant.

7. Deadlift Bar

  • Weight: 20 kg (44 lbs).
  • Use: Specifically designed for deadlifting, this barbell has more flex (whip), allowing the lifter to pull more weight before the plates leave the ground.
  • Features: Longer and thinner than a standard bar, with aggressive knurling for a better grip. The longer sleeve on this bar (the end of the bar) allows for very heavy loads, and can stand up to a huge total weight. The length of the barbell is something to consider if you have a home gym or garage gym. I love the whippy bar though. It’s fun to pull with!

8. Cambered Bar

  • Weight: Typically 60-70 lbs.
  • Use: Primarily used for squats and good mornings. The cambered shape of the bar shifts the weight distribution, making the movement more challenging for stabilizers.
  • Features: A distinctive downward curve on the barbell, often with handles.

9. Log Bar (Log Press Bar)

  • Weight: Typically 70-100 lbs.
  • Use: Common in strongman training for overhead pressing movements.
  • Features: Large, cylindrical shape with neutral grip handles in the center.

10. Axle Bar (Fat Bar)

  • Weight: Varies, often around 45 lbs.
  • Use: Used for grip strength training, overhead presses, deadlifts, and rows.
  • Features: Thicker diameter than a standard barbell (usually 2 inches or more), making it harder to grip.

11. Technique Bar

  • Weight: Typically 5-15 lbs.
  • Use: Used to teach and practice proper lifting technique, especially for beginners or those recovering from injury.
  • Features: Lighter weight than standard barbells, with the biggest difference being that they are often made from aluminum or other lightweight materials.

12. Women’s Olympic Barbell

  • Weight: 15 kg (33 lbs).
  • Length: Typically 6.5 feet (79 inches).
  • Use: Designed for Olympic lifting for women, with slightly smaller diameter and length compared to the men’s version. 
  • Features: Same rotating sleeves and knurling as the men’s barbell but with smaller dimensions. The diameter of the bar helps with grip.

13. Squat Bar

  • Weight: 25 kg (55 lbs).
  • Use: Specifically designed for squats. These bars are stiffer and usually longer to accommodate wider grip positions. 
  • Features: Stiff bar, aggressive knurling, and a thicker diameter. A squat barbell can accommodate a huge amount of weight; load capacity is insane.

14. Buffalo Bar (Bowed Bar)

  • Weight: Typically 45-55 lbs.
  • Use: Mostly used for squatting, this bar has a slight curve that reduces strain on the shoulders and elbows, making it ideal for lifters with shoulder mobility issues.
  • Features: A curved barbell that allows for more comfortable squatting or bench pressing.

15. Short Barbell

  • Weight: 25-35 lbs.
  • Use: Used in smaller spaces or for specific exercises like curls or presses where a full-length barbell is unnecessary. These are also great for home gyms or garage gyms when you don’t have a ton of room and don’t want to put holes in your walls.
  • Features: Shorter than a standard barbell, often around 5 feet in length.

16. Youth Barbell

  • Weight: Typically 10-15 lbs.
  • Use: Designed for younger or smaller lifters to practice technique and build strength. This allows training plates and lighter loads to be used. Training plates are important because they are the same size as 45 pound weight plates, so people who can’t quite deadlift 135 (bar + two 45 pound plates) can still learn the deadlift with the exact same form.
  • Features: Lighter and shorter than a standard barbell, often made of lightweight materials like aluminum. The lifter can develop strength here and add additional weight until they are able to use a standard barbell weight.

​What Weight Barbell Should You Use?

Probably 45 pounds. If that is challenging for you, use a shorter barbell or training bar. Find the right weight for you, one where you can lift well for 8+ reps. If you have general fitness goals like getting stronger, toning up, losing weight and getting fitter, you can use pretty much any kind of bar. Traditional barbells are a great tool for so many uses, and various exercises. Don’t feel like you can’t make progress without all the fancy bars! Use proper form and work hard, and you’ll go far on your fitness journey. 

If you have a home gym or garage gym, check out this article about how to maximize your gym organization, and how to store barbells.

One more common question I get is about smith machine bars and how much they weight. Smith machines, where the bar is on a guided track, vary widely. The Smith machine bar can be completely counterbalanced so that it weights nothing, or it can be closer to 45. Know this as you approach any smith machine, and be prepared for it to be heavy just in case. If that makes you nervous, just ask someone who works there. Most of us who work in gyms are equipment nerds and fitness enthusiasts who would be so happy to help you. 

However. It’s more FUN to use specific bars 🙂 but you can use any. If you have sport specific goals like competing in Olympic lifting competitions or powerlifting, then I would suggest finding a local gym or power gym for your strength and conditioning goals. The wide variety of specialty barbells allows for specific training adaptations depending on your goals and needs. Each barbell type is designed to optimize performance and comfort for specific lifts and training styles.

Work With Me!

If you are looking for a personal trainer in Austin, I’d love to talk with you! If you are not in Austin, Round Rock, or central Texas, let’s talk about online training.

Message me here for a free consult about personal training in Austin, Texas, or here for online personal training, and we’ll discuss your goals, background, equipment availability, schedule, and exercise preferences.

Let’s get you strong and healthy! 💪


About the author

Kathryn Alexander is a strength coach and personal trainer in Austin, Texas. She loves hiking, college football, and the feel of a perfectly knurled barbell. Read more about Kathryn here.


  • cheap fun things to do in Austin. Barton Springs Pool
    Cheap, Fun Things to Do in Austin, Texas (2025)
  • cable squats muscles worked by Kathryn Alexander Austin personal trainer
    Cable Squats: Muscles Worked and How to do Them
  • semi private personal training Austin Texas
    New Semi Private Personal Training in Austin, Texas!
  • The best workouts for healthy Emma Suttie Kathryn Alexander epoch Times
    The Best Workouts for Health: Contributor for Epoch Times
  • dumbbell back workout Kathryn Alexander Austin personal trainer
    Dumbbell Back Workout: The 5 Best Exercises
  • Dumbbell arm workout at home with Kathryn Alexander
    Dumbbell Arm Workout At Home

Filed Under: Home gyms

Home Gym Ideas: Garage Edition (2024)

September 10, 2024 by Kathryn Alexander

Home gym ideas, garage edition! Home gyms are the most fun! I am a huge proponent of having your own home gym, whether it’s in a spare room, a back yard shed, or in your garage.

People get caught up in the pros and cons of a home gym, or a garage gym vs gym membership, or what’s the best equipment for home workouts? There are a million answers to these questions, and the good news, there are lots of ways to get it right! 

home gym ideas garage. Kathryn Alexander personal trainer Austin

If you need home gym ideas, garage gym ideas, or just want to brainstorm, please read along! You are truly only limited by your imagination! And maybe budget, but we’ll address that too. 🙂

Some links in this post are Amazon affiliate links to products that I love and regularly use.

I have put quite a bit of effort and investment into my garage gym. I have a two-car garage, and though I have somewhat limited space, I can park my truck in one side, and house all my home gym equipment on the other. It allows for me to use my own garage gym for good workouts, and active lifestyle, and spending time in a private space. Sometimes there are just so many people out there in public gyms, you know? 🙂

The great thing is that this also allows me to maintain my own equipment. I buy quality equipment and treat it well. After all, I intend to use it for a long time! 

Build Your Dream Garage Gym

The best thing about the millions of options when building your home gym is that you can perfectly and precisely tailor it to you. I encourage you to think about what would be the most fun thing for you to be able to train at home. What would be the best thing that you look forward to having the freedom to do in the comfort of your own home? 

That seems easy enough, but sometimes it’s hard to think that big, or get that creative! That’s ok! Just start thinking on that as you read the following ideas for how to make your home gym or garage gym the best facility for you!

Why Should You Have a Home Garage Gym? 

  • No commute! 
  • Save time! 
  • No waiting for equipment! 
  • No weirdos! (Unless you invite them over)
  • Nobody else’s sweat!
  • No distractions! 
  • All the equipment you have picked! 
  • Your own music! 
  • Your own lighting! 
  • Solitude! Or, invite your friends!

I could go on about what makes a garage gym so great! The convenience of skipping the commute and time can really increase your consistency in training. You can really find tune all the details of your gym too: like I mentioned, the music decisions are yours. You can put the fans and heaters on how you’d like. No weather’s going to stop you from training! 

Of course, a garage home gym is private and comfortable too. You can really focus on your own workouts without the distractions of a public commercial gym. 

Notice I didn’t say this really saves you money, because it can really put a dent in your fun budget, if you know what I mean. It saves you so much time! But not much money. Yes, if you forego your gym memberships, you’ll save a bit of that recurring cost. And weights last forever; if you take good care of your equipment, you can pass it on to your grand kids, and I’m not exaggerating. 

Probably most importantly, having a dedicated workout space at home encourages a healthy lifestyle, making it easier to integrate exercise into your daily routines. This is probably the most important thing for building your health, strength, and reaching your fitness goals.

What Is Your Training Style?

Alright, let’s get down to details. As you read this, consider what equipment you need for your home garage gym. Remember that question I asked, about what would be the best thing you can have readily accessible, to train with? That’s what we need to think about now. Are you a cardio, high reps, high volume kind of exerciser? If so, you might be able to build your dream garage gym space with floor mats, resistance bands, jump ropes and some light dumbbells or kettlebells. If this is your style of activity, you just need extra space to do your work. 

If your idea of an awesome workout is a powerlifting style training session, then you’ll need a squat rack, lots of metal plates, and a good barbell or two. Similarly, if you’ll be doing Olympic lifting/weightlifting, you’ll need a quality barbell, bumper plates, and some open space to move around as well. 

If you are training primarily for hypertrophy or physique goals, then you’ll want free weights, resistance bands, and maybe a few specialty pieces of equipment. You might not need a full power rack but you’ll need more weights than people who are primarily working conditioning or cardiovascular training. 

Finally, the more athletic your goals are, the more floor space you will need. If you can open your garage door, you can open up a small space for a little more room. That might help expand your training options.

a home gym in Austin Texas, by Kathryn Alexander
a home gym in Austin Texas, designed by Kathryn Alexander

Home Gym Ideas for All Training Styles

Before we get into specifics, let’s talk about the kinds of equipment you’ll need that will apply to all kinds of training. In a nutshell, this means:

  • safe and durable flooring
  • storage space
  • good quality exercise equipment

Flooring For Your Home Gym

When building a home gym, choosing the right flooring is crucial for protecting your equipment, reducing noise, and ensuring safety. Most garages have concrete flooring, so it’s particularly important to add some kind of protective layer. Here’s why and what to consider:

Why You Need Mats or Flooring Over Concrete:

  1. Shock Absorption: Concrete is hard, offering no cushioning. Using mats or gym flooring will absorb impact from exercises like lifting weights or jumping, which can reduce the risk of injury and protect your joints.
  2. Protect Equipment: Dropping weights on concrete can damage the equipment and the floor itself. Mats help to cushion the impact and prevent damage.
  3. Noise Reduction: Mats can help reduce noise when moving or dropping weights, which is particularly useful if your gym is located near living spaces.
  4. Comfort: Mats provide a more comfortable surface for exercises like yoga, stretching, or bodyweight workouts.
  5. Anti-Slip Surface: Concrete can be slippery, especially if you sweat during workouts. Mats with textured surfaces provide grip and reduce the risk of slipping.

Recommended Types of Flooring for Home Gyms:

  1. Rubber Flooring:
    • Durability: Rubber is the most common material used in gym flooring because it’s durable and provides good shock absorption.
    • Thickness: Thicker rubber (8mm to ¾ inch or more) is ideal for heavy lifting areas, while thinner rubber (6mm) works for cardio and general fitness areas.
    • Rolls or Tiles: You can buy rubber flooring in rolls (for covering large areas) or tiles (for more customizable spaces). Tiles are easier to install.
  2. Foam Mats:
    • Lightweight Use: Foam tiles or mats are great for light exercises like yoga, stretching, or bodyweight exercises but not recommended for heavy weights as they may dent or wear down.
    • Interlocking Design: These mats usually have an interlocking puzzle design, making them easy to install and replace if damaged.
  3. PVC or Vinyl Flooring:
    • For Multipurpose Areas: These materials offer a more polished look and are durable. They are good for areas used for multiple purposes beyond just fitness (e.g., garages).
    • Less Shock Absorption: They aren’t as shock-absorbent as rubber but are good for areas where you won’t be dropping heavy weights.
  4. Horse Stall Mats:
    • Cost-Effective Option: These are thick, durable rubber mats commonly used in gyms. They are cheaper than gym-specific rubber flooring but offer similar protection.
    • Size: They typically come in larger 4’x6’ sections and can cover a significant area.

What to Consider:

  • Thickness: For weightlifting or using heavy equipment, go for 8mm or thicker rubber mats. These are a bit more heavy duty. If you’re doing mostly cardio, bodyweight exercises, or lighter weight training, 6mm to 8mm mats should suffice.
  • Area of Use: You can use thicker mats in specific areas where you do heavy lifting and thinner, less cushioned mats for stretching or cardio zones.

If you have a concrete floor, rubber mats or horse stall mats are highly recommended to prevent damage to the concrete and equipment, as well as to provide better comfort and shock absorption.

I have stall mats from Tractor Supply. You can also get good mats from Home Depot or Amazon. 

home gym ideas garage; where I got started
Where my gym I got started!

Equipment Storage

Organizing a garage space/home gym efficiently is key to keeping your workout space functional, safe, and clutter-free. Here are some essential storage solutions for common gym equipment, including barbells, plates, and accessories:

1. Barbell Storage

  • Vertical Barbell Holder (Barbell Rack): These hold barbells vertically to save floor space. They typically hold multiple barbells (2, 4, or even more). This type of storage also protects the barbell’s knurling and keeps them from rolling around.
  • Horizontal Wall-Mounted Barbell Rack: Also called barbell gun racks, these racks mount on the wall and hold the barbells horizontally. They’re great if you have more wall space and want easy access to the bars.
  • Floor-Mounted Barbell Rack: If you don’t want to mount anything on the wall, floor racks can store barbells horizontally on the ground. Some also come with additional storage for other equipment like plates or collars.

2. Weight Plate Storage

  • Plate Tree (Vertical Plate Storage): A plate tree is a vertical storage unit with arms for organizing different-sized plates. It keeps your plates off the floor and makes them easy to access.
  • Wall-Mounted Plate Storage Pegs: If you want to save floor space, wall-mounted pegs allow you to store your weight plates on the wall. They are especially helpful for keeping bumper plates organized.
  • Power Rack with Plate Storage: Many power racks come with built-in plate storage attachments, so you can store your plates right on the rack without needing additional equipment.
  • Rolling Plate Rack: This mobile storage option is great for easily moving weight plates around the gym, especially if you have a larger space.

3. Dumbbell and Kettlebell Storage

  • Dumbbell Rack: A 2- or 3-tier dumbbell rack is essential for keeping your dumbbells organized. They’re available in different sizes depending on how many dumbbells you have.
  • Kettlebell Rack or Shelf: Kettlebells can be stored on either a dedicated rack or a multi-purpose shelving unit. Some racks have flat shelves to accommodate various sizes.
  • Wall-Mounted Kettlebell Hooks: If floor space is limited, you can install wall-mounted hooks specifically designed to hold kettlebells.

4. Resistance Bands and Small Accessories

  • Wall-Mounted Pegboard: A pegboard with hooks is perfect for storing resistance bands, jump ropes, collars, lifting belts, and other smaller accessories. It keeps them organized and easy to access. Bands are crucial for back exercises, which are sometimes harder to do at home.
  • Over-the-Door Storage Rack: These racks have hooks or mesh compartments to store bands, towels, or smaller gym items, and they can be easily hung over a door in your gym.
  • Storage Bins or Baskets: Stackable bins or baskets can store miscellaneous items like foam rollers, yoga blocks, or smaller pieces of equipment.
  • Drawer Units or Shelves: Small drawer units or shelves can help keep accessories like chalk, wrist wraps, lifting straps, and other items organized and easy to reach.

5. Medicine Ball and Slam Ball Storage

  • Ball Rack: A vertical or tiered rack designed to hold medicine balls, slam balls, or wall balls can keep these pieces organized and prevent them from rolling around.
  • Wall-Mounted Ball Storage: Wall-mounted holders are also an option to keep balls off the floor and save space.

6. Storage for Mats and Foam Rollers

  • Wall-Mounted Mat Hooks: Mats can be hung on hooks or rails to keep them off the floor and to ensure they don’t take up unnecessary space.
  • Foam Roller Stand or Wall Rack: You can get a small rack or holder that keeps foam rollers standing upright. Some wall-mounted racks can also hold rollers alongside mats or bands.

7. Power Rack Storage Attachments

  • Power Rack Storage Attachments: Many modern power racks offer attachment options for storing accessories like resistance bands, weight plates, barbells, or even landmine attachments. This can maximize space and reduce clutter in your gym.

8. Wall-Mounted Shelves or Cabinets

  • Multi-Purpose Shelving: For items like water bottles, towels, or tech (phones, headphones, etc.), wall-mounted shelving units or cabinets can keep everything tidy and off the floor.

9. Collar and Clip Storage

  • Magnetic Wall Mounts: Magnetic storage solutions for collars and clips can attach them directly to a rack or the wall, making them easily accessible.
  • Small Hooks or Bins: You can also use small hooks or bins specifically for your collars, which can be mounted on a wall or attached to a rack.

10. Multi-Purpose Storage Benches

  • Storage Bench: A flat or adjustable bench that doubles as a storage compartment can hold smaller equipment like resistance bands, wraps, or dumbbells. This is a great way to save space while adding utility to your bench.

Whether you are training for specific competitive goals, or training to increase health of fitness, there are some pieces of equipment you will need regardless. In various strength training disciplines like powerlifting, Olympic weightlifting, bodybuilding, and general strength training, several pieces of equipment are essential, despite the differences in technique, goals, and training styles.

Here’s a list of equipment that is commonly used across these disciplines:

1. Olympic Barbell

  • Description: The Olympic barbell is a staple across almost all forms of lifting. It typically weighs 20 kg (45 lbs) for men and 15 kg (33 lbs) for women. The sleeves of the bar rotate (bearings or bushings), which is crucial for exercises like cleans and snatches.
  • Use Across Disciplines:
    • Powerlifting: Used for squats, bench press, and deadlifts.
    • Olympic Lifting: Central to movements like the snatch and clean & jerk.
    • Bodybuilding & General Strength: Used for a wide range of compound and isolation exercises.

2. Weight Plates (Bumper Plates or Metal Plates)

  • Description: Plates are needed to load the barbell, and they come in different materials. Bumper plates are rubberized and designed to be dropped safely, while metal plates are often used for powerlifting and bodybuilding.
  • Use Across Disciplines:
    • Powerlifting: Metal or iron plates are typically used for precise weight loading in squat, bench, and deadlift.
    • Olympic Lifting: Bumper plates are essential to allow for the bar to be safely dropped during cleans, snatches, and jerks.
    • General Strength & Bodybuilding: Both types are used depending on the exercise and preference.

3. Squat Rack / Power Rack

  • Description: A sturdy frame with adjustable safety bars and pins for holding the barbell at different heights. This allows for safe squatting and other lifts like bench presses and overhead presses. The best squat racks are heavy, sturdy, and safe. If you don’t want a whole squat cage or power rack, you can use a squat stand.
  • Use Across Disciplines:
    • Powerlifting: Essential for squats and often for bench press.
    • Olympic Lifting: Often used for squats (front and back) as part of strength development.
    • General Strength & Bodybuilding: Used for squats, presses, and even pull-ups if it has a bar attachment.

4. Weightlifting Shoes

  • Description: Specialized shoes with a raised heel that helps lifters maintain better form, especially in squats and Olympic lifts, by allowing for better ankle mobility.
  • Use Across Disciplines:
    • Powerlifting: Often used during squats for improved depth and form.
    • Olympic Lifting: Essential for snatches, clean & jerks, and squats.
    • General Strength: Some lifters use them for squats and overhead presses.

5. Chalk

  • Description: Lifting chalk (magnesium carbonate) helps to improve grip by reducing sweat on the hands.
  • Use Across Disciplines:
    • Powerlifting: Common for deadlifts and other heavy lifts to enhance grip.
    • Olympic Lifting: Essential for cleans, snatches, and jerks.
    • General Strength & Bodybuilding: Used by some lifters for grip-intensive exercises like deadlifts or pull-ups.

6. Lifting Belt

  • Description: A weightlifting belt helps stabilize the core and reduce stress on the lower back by providing intra-abdominal pressure during heavy lifts.
  • Use Across Disciplines:
    • Powerlifting: Heavily used for squats and deadlifts.
    • Olympic Lifting: Some lifters use it for clean & jerk or snatch, especially during heavy sets.
    • General Strength & Bodybuilding: Optional but commonly used during heavy compound lifts like squats and deadlifts.

7. Collars/Clips

  • Description: Collars or clips secure the plates on the barbell to prevent them from sliding off during lifts.
  • Use Across Disciplines: Used universally across powerlifting, Olympic lifting, bodybuilding, and general strength training to secure weight plates during lifts.

8. Bench

  • Description: A flat or adjustable bench is used for exercises like the bench press and a variety of other pressing and pulling exercises. I have a bench from Sorinex and a bench from Fringe sport. I love both. 
  • Use Across Disciplines:
    • Powerlifting: Essential for the bench press.
    • General Strength & Bodybuilding: Used for bench press, incline press, dumbbell exercises, and more.

9. Resistance Bands

  • Description: Bands add resistance or assistance in lifts. They can be used for mobility work, warm-ups, or to change the resistance curve of an exercise (accommodating resistance).
  • Use Across Disciplines:
    • Powerlifting: Used for accommodating resistance (e.g., banded squats, deadlifts) or warm-ups.
    • Olympic Lifting: Often used for mobility work or warm-ups.
    • General Strength & Bodybuilding: Common for warm-ups, mobility, or even adding resistance to lifts.

10. Kettlebells and Dumbbells

  • Description: While barbell training is central, kettlebells and dumbbells are used to supplement training and for accessory work.
  • Use Across Disciplines:
    • Powerlifting: Used for accessory exercises like rows, lunges, and presses.
    • Olympic Lifting: Often used for mobility and supplemental strength training.
    • Bodybuilding & General Strength: Common for hypertrophy work and targeting smaller muscles.

11. Pull-Up Bar

  • Description: A pull-up bar is a versatile piece of equipment for bodyweight exercises, often included as part of a power rack.
  • Use Across Disciplines:
    • Powerlifting & Olympic Lifting: Used for accessory back and grip work.
    • General Strength & Bodybuilding: Common for pull-ups, chin-ups, and core exercises.

While each lifting discipline has its unique requirements, these pieces of equipment serve as a foundation for strength training across the board, allowing for versatile and effective workouts regardless of the specific focus.

Related: how to heat a garage gym in the winter

​Home Gym Ideas: Garage Decoration

The best part about getting a good workout in your own garage gym is that you are in charge of every last thing. You can take an empty garage and make it the best home gym ever. Hang your motivational posters, decorate your garage walls, and hang that American flag. Play your loud music, crank the air conditioning if you’ve installed one. 

These are some of the best garage gym ideas I have! Let me know if I’ve missed an essential piece of equipment, of a fun way you’ve built up your own gym. Happy training in your own garage gym! 


About the author

Kathryn Alexander is a strength coach and personal trainer in Austin, Texas. She loves hiking, college football, and the feel of a perfectly knurled barbell. Read more about Kathryn here.


  • cheap fun things to do in Austin. Barton Springs Pool
    Cheap, Fun Things to Do in Austin, Texas (2025)
  • cable squats muscles worked by Kathryn Alexander Austin personal trainer
    Cable Squats: Muscles Worked and How to do Them
  • semi private personal training Austin Texas
    New Semi Private Personal Training in Austin, Texas!
  • The best workouts for healthy Emma Suttie Kathryn Alexander epoch Times
    The Best Workouts for Health: Contributor for Epoch Times
  • dumbbell back workout Kathryn Alexander Austin personal trainer
    Dumbbell Back Workout: The 5 Best Exercises
  • Dumbbell arm workout at home with Kathryn Alexander
    Dumbbell Arm Workout At Home

Filed Under: Home gyms

Full Body Band Workout at Home: 12 Best Exercises

June 10, 2024 by Kathryn Alexander

A full body band workout at home: the 12 best exercises for a complete resistance band workout. The closest thing you can get to having a full-body workout machine at home!

You probably know by now that I am a huge proponent of investing in your own home gym equipment, whether it’s resistance bands and some weights, or fully decking out a garage gym with barbells and equipment.

You can even learn bodyweight exercises and perfect them. I just think it’s hugely important to always be able to exercise. Specifically, strength training is important to be able to do regularly.

Today I’ll teach you a full-body resistance band workout. Resistance band workouts are great for so many reasons! Resistance bands are so portable: they’re lightweight and their compact design makes them easy to store and transport. They’re similar to the functional trainer at the gym, but you can take them with you wherever you go, whether it’s on vacation, to the office, or outdoors.

full body band workout at home: band ab work demonstrated by Austin personal trainer Kathryn Alexander

The Benefits of Resistance Bands

They offer a wide range of resistance levels, allowing you to easily adjust the intensity of your workouts by using different bands or adjusting the length of the band. This versatility makes them suitable for people of all fitness levels, from beginners to advanced athletes. Heck, you can even share bands in the same workout without the time or effort of adjusting weights/machine settings, etc.

My favorite bands are the kind pictured above, that I’m using in my garage gym. I prefer these laminated ones rather than the tubing. I’ve bought so many of these because I use them everywhere. (This is an affiliate link to the band I use. If you purchase through this link, I may make a small commission at no extra cost to you.)

Resistance bands are also relatively inexpensive, compared to most exercise equipment. You can get a full set of bands for a fraction of the cost of traditional gym equipment. They’re a great tool for a full body band workout at home.

You can set up your workout station even on the go, in a hotel room or outside. Bands don’t take up much space, but they give you the resistance you need for great training.

They allow you to work every muscle group in your body and perform a wide variety of exercises, including squats, lunges, chest presses, rows, bicep curls, shoulder presses, and more. Plus, you can easily modify exercises to make them easier or more challenging by adjusting your grip or stance.

This provides a smooth and controlled resistance throughout the entire range of motion, which can be gentler on your joints compared to free weights or machines. This makes them an excellent option for people recovering from injuries or dealing with joint pain.

Overall, resistance bands are a convenient, affordable, and effective tool for home workouts, allowing you to get a full-body workout without the need for a gym membership or equipment that takes up your whole garage so that you can’t park in the garage during random Austin hailstorms. Oddly specific, I know. 

The Full Body Band Workout

Below is a list of the 12 exercises that I recommend for a full body resistance band workout. Farther in the article is a description of how to do each, along with videos. 

  1. band pullaparts    
  2. band pullaparts pulldowns 
  3. squats with resistance bands
  4. banded push-ups
  5. banded rows
  6. standing banded shoulder press
  7. lateral band walks
  8. banded glute bridges
  9. alternating leg lifts with bands
  10. banded lat pulldowns
  11. banded bicep curls
  12. banded deadlifts

These exercises provide a full-body workout using resistance bands and can be easily modified to suit your fitness level and goals.

How to Do The Band Exercises

Band Pullaparts

These are classic band exercises. Pullaparts are great for back, shoulders, and good posture. To do the band pullapart:

  • stand tall
  • extend your arms in front of you, gripping a light band
  • keep elbows straight but not locked as you press your arms straight around your side
  • I prefer palms down but you can experiment with different hand positions
  • squeeze your shoulders behind you as you make a big wide sweep with your arms
  • press until the band touches your chest
  • control the return to your start position and repeat 

Band Pullaparts (Pulldown)

Upper body work is tough to do without pulling machines, but this is another great pulling band exercise.If it feels abstract with you, experiment until you can feel your lats (underneath your armpits) squeezing. BTW, I named these pullapart pulldowns. If you have a better name, please let me know. 🙏🏼

To do the band pullapart pulldown:

  • stand tall holding the band slightly wider than shoulder width
  • initiate the pull by squeezing your shoulder blades down
  • pull until the band is neck level
  • you can pull in front of your behind your head
Band pullaparts
Band pullaparts (pulldown)

Squats with Resistance Bands

The resistance band adds extra tension to target your glutes, quads, and hamstrings. This is one of the best lower body resistance band exercises. To do squats with resistance bands:

  • place the resistance band under your feet and hold the handles at shoulder height
  • perform squats by pushing your hips back and bending your knees
  • keep your feet flat on the ground
  • press your big toes into the ground as you drive back into your start position

Banded Pushups

Banded pushups are pretty fun! If you aren’t proficient with non-banded pushups, work on those first. These add a challenge, for sure. To do banded pushups:

  • loop the resistance band around your back and hold the ends in each hand while in a push-up position
  • perform push-ups while maintaining tension on the band, engaging your chest, shoulders, and triceps

Banded Rows

There are a few ways you can do rows with the band. You can do them standing, seated, and with the band anchored from wherever is secure. To do banded rows:

  • stand with the band anchored in front or you or sit on the floor with your legs extended and loop the resistance band around your feet
  • hold the ends of the band with both hands, palms facing each other
  • perform rows by pulling the band towards your torso, squeezing your shoulder blades together to engage your back muscles
  • again, I beg of you, make sure this band is secure! Please please don’t let it slip off and pop yourself in the face
resistance band rows

Standing Band Shoulder Press (Overhead Press)

I prefer to do this one arm at a time so I am going to give you directions that way. To do the standing band shoulder press:

  • stand with your right foot on a light band
  • keeping your entire body engaged, hold the band in your right hand and press your right hand toward the ceiling
  • control to your start position and do as many reps as you plan
  • from there, repeat, stepping on the band with your left foot and pressing with your left arm
  • please make sure you are stepping on this securely! I do not want you to be on a blooper reel!

Lateral Band Walks

This exercise strengthens your hip abductors and glutes, improving hip stability. Also lights a nice little fire in your quads if you maintain that squat position. To do lateral band walks:

  • place the resistance band around your ankles OR under your feet, and assume a quarter-squat position. You can squat a bit more than I do in this demo video, for bonus points 🙂
  • step sideways against the resistance of the band, maintaining tension throughout the movement
  • drive with both legs; don’t just press into the band
  • maintain a straight line in your body, instead of leaning into the movement and bobbling back and forth
lateral band walks

Banded Glute Bridges

To do banded glute bridges:

  • lay on your back with your knees bent and feet hip-width apart, placing the resistance band just above your knees
  • lift your hips off the ground, squeezing your glutes at the top of the movement
  • lower your hips back down and repeat
  • this exercise effectively targets your glutes and hamstrings

Alternating Leg Lifts With the Band

This is one of my favorite ab exercises! In fact, I wrote a whole blog post about alternating leg lifts with bands here. These work abs and hip flexors together, which is fantastic for core and hip strength. To do the leg lifts with the band:

  • lay on your back with feet up, and hands on a band that is secured above your head
  • straighten your arms and tighten your whole core
  • use your abs to press your lower back into the ground
  • slowly lower your left leg all the way down and then back up
  • you can keep a slight bend in your knee if you need
  • repeat with your right leg, down and up before you begin again with the left leg
  • continue one leg at a time, maintaining tension into the band and through your whole core

If this is too tough to rig up at home, just do some planks and plank variations. More info here.

alternating leg lifts with band (for abs)

Banded Lat Pulldowns

Lat pulldowns are notoriously hard to repeat at home. However, if you can find a place to anchor your band, then you are good to go. A great option here is to vary your anchor point; if you can pull from a higher position, and medium position, that’s fantastic for your back. To perform the band lat pulldown:

  • attach your band securely as high as possible
  • step back and hinge over so your band is originating from above your head now
  • squeeze your shoulders blades down and follow with your elbows
  • pull elbows toward your hips, not behind you-squeeze your lats hard at the bottom of the movement
  • reverse the movement, beginning with extending your elbows, then allowing your shoulder blades to move upward again
Band lat pulldowns

Banded Biceps Curls

The bicep curl is also simpler to do with dumbbells; however, the resistance band bicep curl has the benefit of maintaining resistance throughout the whole movement. To do the banded biceps curls:

  • stand with both feet on the band (again, securely!)
  • ggrip the top of the band with both hands
  • you can take a neutral grip, meaning palms face each other, or you can keep your palms facing up (supinated position)
  • tighten your shoulders back and hold in this position, as you straight your elbows, and then bend elbows to curl up
  • return to your start position and do as many reps as you’d like

Banded Deadlifts

I saved one of the coolest for last! I really love this one, and it feels great! Hands down, my favorite exercise during a full body band workout at home. To do the banded deadlift:

  • stand over an appropriately resistant band-grab the center of the band, choking up if you need to increase the resistance
  • keep your whole trunk engaged and neutral
  • bring your hips toward the ground and grab the band
  • keeping your arms straight and your trunk unmoving, squeeze your glutes and grab the ground with your toes
  • press the ground away from you as you stand all the way up
  • reverse the movement to return to your starting position
Banded deadlift. Deadlifts with the band are inexplicably fun. Try it!

Bonus Band Lift: Pallof Press

OK here’s a bonus lift, your baker’s dozen: The Pallof Press. I just couldn’t narrow them down! Take care to maintain your feet shoulder-width apart here. If you find yourself taking a really wide stance and bending your knees excessively, you’ll be taking work away from your core. That’s not necessarily a wrong position! It’s very stable! But here, you’re trying to make your torso do the stability, so don’t let your legs take all the work. To perform the Pallof press:

  • stand upright with a band secured at your side, at chest level
  • grab the band with both hands in front of your sternum
  • step sideways into pressure from the band
  • press straight out in front of you and control your return to start position
  • do not lean into or reach into the press
Pallof press with a resistance band

How to Incorporate These Resistance Band Exercises

You can do these exercises all in a row, making it a giant full body workout. You could also do the upper body ones as a standalone upper body day, and similar with the lower body exercises if you’d like to make it a leg day. If you do that, I suggest doing the alternating leg lifts and Pallof press on either or both days. 

I suggest starting each exercise pretty lightly, and getting high reps to start with. Aim for 15-20, and see how you respond. Rest, and repeat. Keep practicing, and you’ll perfect your full body band workout at home.

More Notes About Using Resistance Bands

As I have mentioned, the resistance bands are a great way to get full body bands workouts at home or hit all the major muscle groups at home or while you’re traveling. They are just an effective way to do strength training in general. However, we need to buy quality bands and maintain them so that they are safe.

Always inspect your bands before you use them for any tearing or fraying. Do not loop bands around anything sharp that will cut or dig into them. Be careful if you leave them outside because they weather and tear faster. In fact, just bring them inside. They don’t take up much space so you could even throw them under the couch, in a drawer or any other little small space.

full body band workout at home: the Pallof press demonstrated by Austin personal trainer Kathryn Alexander

Ways to Increase the Challenge of Resistance Bands

Unlike working with barbells, dumbbells or machines, you can’t just set the weight higher with exercise bands. Some bands are labeled with pounds of resistance, but that’s kind of ambiguous. Besides, as they get older and more worn, that number changes. So how do you progress? There are many ways to increase the challenge of resistance band work:

You can add reps if you’d like an increased challenge. 

You can do mechanical drop sets, which means hold the band tighter, for 10 or so reps, then adjust your grip so it is looser. Then do 10 more reps. Then adjust again, reducing resistance. The culmination of 30+ reps will get you! 

Of course, if you have a set of resistance bands and not just one, you can choose the thicker bands for greater resistance.

You can add pauses at the point of resistance, so you are working the entire time and increase your time under tension. 

12 Exercises for Full Body Band Workout At Home

So there you have it! Twelve of the best resistance band exercises for at-home workouts! Resistance band training is really all about getting creative! Whether you have mini bands, power bands, heavy bands, the small looped bands, experiment with what works best for you.

Because resistance bands require you to stabilize your body and engage your core muscles to control the resistance, they help improve your overall strength, stability, and balance, which translates to better functional fitness for everyday activities.

The best resistance band workout is one that gives you a little work, some strength training, and gets you toward your fitness goals. Let go of the idea that it needs to be perfectly counted and structured, and focus on what works for you. 

Want a Bump Up from Band Work?

If you have some more exercise equipment like medicine balls, adjustable dumbbells, a jump rope and even a yoga mat, you can add in some extra exercises to increase your heart rate and bump up the intensity of your session.

Check out The Home Team if you have a few pieces of home gym equipment and prefer to exercise from the comfort of your own home. You don’t need a large multi-station home gym or power rack for this workout program.

A basic home gym setup of bands, a medium pair of dumbbells and one heavier weight (dumbbell or kettlebell) will do. They’re super fun, but no squat rack required.

The above links are affiliate links to products & brands I actually use, which may make me a small commission at no extra cost to you.

Work With Me!

If you are looking for a personal trainer in Austin, I’d love to talk with you! If you are not in Austin, Round Rock, or central Texas, let’s talk about online training.

Message me here for a free consult about personal training in Austin, Texas, or here for online personal training, and we’ll discuss your goals, background, equipment availability, schedule, and exercise preferences.

Let’s get you strong and healthy! 💪


About the author

Kathryn Alexander is a strength coach and personal trainer in Austin, Texas. She loves hiking, college football, and the feel of a perfectly knurled barbell. Read more about Kathryn here.


  • cheap fun things to do in Austin. Barton Springs Pool
    Cheap, Fun Things to Do in Austin, Texas (2025)
  • cable squats muscles worked by Kathryn Alexander Austin personal trainer
    Cable Squats: Muscles Worked and How to do Them
  • semi private personal training Austin Texas
    New Semi Private Personal Training in Austin, Texas!
  • The best workouts for healthy Emma Suttie Kathryn Alexander epoch Times
    The Best Workouts for Health: Contributor for Epoch Times
  • dumbbell back workout Kathryn Alexander Austin personal trainer
    Dumbbell Back Workout: The 5 Best Exercises
  • Dumbbell arm workout at home with Kathryn Alexander
    Dumbbell Arm Workout At Home

Filed Under: Home gyms, Training

Leg and Glute Home Workout For Lower Body Strength

May 6, 2024 by Kathryn Alexander

Here is a leg and glute home workout, for those times you can’t make it to the gym. 

Leg and glute workouts are the best! They’re so fun to do at the gym, but sometimes you want to do work from the comfort of your own home. Strong legs and strong glutes mean you can go hike, run, take on stairs easily, and you’ll keep lower back pain at bay.

There’s no reason not to work legs and glutes, the strongest muscles of the body. Try this leg and glute home workout, and let me know what you think! 

What Equipment You Need

This workout will assume you have some weights, maybe a pair of dumbbells or kettlebells, but not a barbell or machines. If you don’t have any weights or a resistance band, then you can do them all as bodyweight exercises. The weight and band resistance is just a bonus!

leg and glute home workout
A single kettlebell or dumbbell can be utilized well during leg and glute home workouts.

I’ll get right into the outline of the workout. Below that I will give explanations of how to do each exercise, including a video link. Finally, at the end of this article I’ll explain more about glute and leg anatomy if you’d like further reading. 

Leg day, commence!!

The Workout

Warm-up:

  1. 5 ish minutes of general movement (walking, jogging in place, high knees, bodyweight squats)
  2. Dynamic stretches for the legs and hips (leg swings, hip circles, lunging twists). Just enough movement to begin to feel looser and ready to work.

Main Workout:

  1. Squats:
    • Bodyweight squats: 3 sets of 12-15 reps
    • Progression: Goblet squats with a dumbbell or kettlebell
  2. Lunges:
    • Any variation you’d like (forward, reverse, or walking): 3 sets of 10 reps per leg
    • Progression: holding weights
  3. Bulgarian Split Squat
    • 3 sets of 10 reps per leg
    • Use a chair or elevated surface to rest one foot behind you while performing a split squat motion
  4. RDL:
    • 3 sets of 12 reps per leg
    • Progression: B stance RDL (directions below)
  5. Calf raises
    • 3 sets of 15 reps
    • Stand with feet hip-width apart and raise heels as high as possible, then lower back down
  6. Glute Bridges:
    • Bodyweight glute bridges: 3 sets of 15 reps
    • Progression: Single-leg glute bridges or weighted glute bridges, with a weight across your hips

How to do the Squat

If you can do this squat forever, you won’t get stuck on a low couch or in the restroom. You’ll keep your independence through old age. In my very first year as a certified personal trainer, before I even got a degree, I told a studio full of sorority girls this. Lol I STILL believe it! But, as you can imagine, the message didn’t land. Anyhow. It’s true.

You can add weight or reps to increase the challenge, but this alone will do wonders for your full body health.

To do the squat:

  • stand on a flat, level surface with both feet on the ground
  • keep your back straight and neutral
  • Upper body does not move; spine doesn’t flex or extend the entire time
  • arms in front of you-break at the hips to initiate squat
  • sit deep into heels-squeeze big toe into the ground as you stand

People often say to stand with feet shoulder-width apart for an ideal squat position, but I believe it’s better to be a bit wider. I’m comfortable with my feet wider. That’s fine too. As you squat, keep your knees big-toe width or wider. If you can do that, you can squat with as wide a stance as you’d like.

Also, every person squats differently, depending on leverages and angles of our femoral head in the hip socket, and other things we can’t even see. All my clients squat differently. Don’t force your squat to look like someone else’s.

Note that you’ll hinge forward from the hips as you squat. This is the correct way to squat. Do not get this confused with bad positioning. You cannot squat with your upper body in an upright position unless you use something like the sissy squat. Keep your back tight and neutral, no lower back rounding, and you’ll be ok. 

How to do Lunges

To do walking lunges:

  • from a tall standing position, step your right foot in front of you as if you are walking on railroad tracks not a tightrope
  • aim to land with a 90 degree angle in both knees
  • knee should be close to the floor but not touching
  • press into the ground through your heel and big toe, and squeeze your glutes to return to your starting position
  • repeat with your left leg. Do an equal number of reps on each leg

To do the reverse lunge:

  • from a tall standing position, step your right leg behind you
  • aim to land with a 90 degree angle in both knees
  • knee should be close to the floor but not touching
  • remember, you’re on railroad tracks, not a tight rope!
  • press into the ground through your heel and big toe, and squeeze your left foot into the ground
  • drive with your glutes to return to your start position

To do lateral lunges with feet stationary:

  • stand tall with legs approximately double shoulder width apart
  • bend into your right knee
  • keep your whole foot, including right heel on the ground
  • left knee will stay soft (slight bend) but straight-stand back up into the standing position
  • repeat on the left leg

You will feel this stretch on your inner thighs and that’s ok!

These are very similar to Cossack squats, which are a bit more advanced. If you’re more comfortable with those, you can do those here. 

Bulgarian Split Squats

How to do Bulgarian split squats:

  • set up facing away from a sturdy box, chair or bench
  • put one leg behind you, on the box
  • from here, bend both knees to accomplish the split squat
  • stop before your knee hits the ground
  • focus on the leg in front to do the work; make sure your whole foot is on the ground
  • squeeze your glutes, and drive your big toe in the ground as you come up
  • repeat for as many reps as you are performing
  • switch legs
Legs; Bulgarian split squat demo for exercise library
Bulgarian split squats, demonstrated by Austin personal trainer Kathryn Alexander

Tips for Bulgarian split squats:

  • you can put your toes on the bench, like I do in the video, or put your foot flat on the bench, with the top of your foot resting on the bench
  • situate your feet so that there is lateral stability between them
  • by this I mean, if you were to look down, your feet are as if you are on railroad tracks and not a tightrope
  • you might have to hop your front foot out to the side to accomplish this. You’ll feel more stable this way. 
  • you’ll probably find one side is more stable than the other. That is ok!

Here’s a full tutorial on how to do Bulgarian split squats if you’d like more details.

Romanian Deadlift with Dumbbells

To perform the RDL, Romanian deadlift, with dumbbells: 

  • stand tall with dumbbells in front of you
  • hold the dumbbells close to your body for the duration of the exercise
  • squeeze your back to keep it straight and neutral
  • push your hips behind you with knees soft
  • let your hamstrings stretch as you lower the weights, keeping them close to your legs. 

Romanian deadlifts can be tough to master. Remember it is a hard hinge! Keep practicing and it will make more sense to you. If you want more details, check out this whole post on how to do RDLs with dumbbells.

B Stance RDLs

The B-stance RDL, a staggered stance Romanian deadlift, is a fantastic lift that allows you to build strength symmetrically without the added challenge of also working balance. It’s comparable to single-leg deadlifts. Here’s how you do a B stance RDL:

  • set up with a kettlebell or dumbbell in your regular stance
  • position your right foot back at about the level of your left heel.
  • keep your torso at a hard neutral (no rounding or arching) and send your hips behind you
  • keep your hips level as you squeeze your glutes to stand back upright
  • add these as an accessory after your main lifts.

Here’s a full tutorial on how to do B stance RDLs. I love these! They are worth taking the time to learn well.

how to do B-stance RDL
how to do B-stance RDLs for a leg and glute home workout

Glute Bridge, 1 Leg at a Time

Glute bridges and hip thrusts are a great way to work your glute muscles. You can start this exercise with both feet on the ground to get a feel for it. From there, if you’d like a challenge, do the 1 leg version, described below. 

  • lay on your back with your knees bent and heels directly under your knees
  • squeeze your glutes and abs so your ribs aren’t flared up toward the ceiling
  • extend one leg 
  • squeeze your glutes to push hips off the ground and control back down

Calf raises

To do the calf raise: 

  • stand holding on for balance if you need (that is ok- the goal of this exercise is not balance, so you aren’t compromising your results by holding on for balance)
  • with your toes gripping the ground, press the ball of your foot into the ground so that your heels raise
  • squeeze your calves at the top and lower your heels to the ground under control
  • you can do these standing with your toes and ball of your feet elevated on a step/stairs, or on the flat ground

Leg and Glute Anatomy

Obviously, the leg and glute muscles make up the musculature of the lower body, so it helps to understand what the muscles are and what they do. Below is a quick description of each of the lower body muscles and their muscle anatomy:

  1. Gluteus maximus:
    • The largest and most superficial gluteal muscle.
    • Responsible for hip extension, outward rotation, and abduction.
    • Plays a significant role in activities like walking, running, climbing stairs, lunges, and split squats. 
  2. Gluteus medius:
    • Located on the outer surface of the pelvis.
    • Functions in hip abduction, internal and external rotation, and stabilization of the pelvis during walking and running.
    • Helps maintain pelvic alignment and stability during single-leg activities.
  3. Gluteus minimus:
    • Lies beneath the gluteus medius.
    • Assists in hip abduction and internal rotation.
    • Works in conjunction with the gluteus medius to stabilize the pelvis and support the hip joint.

These muscles work together to provide stability, strength, and mobility to the hip joint and pelvis, contributing to various movements and functional activities.

  1. Quadriceps:
    • Located on the front of the thigh.
    • Comprised of four muscles: rectus femoris, vastus lateralis, vastus medialis, and vastus intermedius.
    • Responsible for extending the knee and assisting in hip flexion. Quads and hip flexors are involved in leg extensions, squats and lunges. 
  2. Hamstrings:
    • Located on the back of the thigh.
    • Comprised of three muscles: biceps femoris, semitendinosus, and semimembranosus.
    • Responsible for flexing the knee and extending the hip. Hamstrings are also involved in squats and lunges, and especially involved in deadlifts and hinge movements.
  3. Adductors:
    • Located on the inner thigh.
    • Comprised of several muscles, including adductor longus, adductor brevis, adductor magnus, and gracilis.
    • Responsible for bringing the leg towards the midline of the body (adduction). Think of the seated adduction machine here, where you squeeze your knees together.
  4. Gastrocnemius:
    • Calf muscle located on the back of the lower leg.
    • Responsible for plantar flexion of the foot (pointing toes downward) and assisting in knee flexion.
  5. Soleus:
    • Located beneath the gastrocnemius.
    • Also contributes to plantar flexion of the foot but is more active during activities like walking and standing.
  6. Anterior tibialis:
    • Located on the front of the shin
    • Responsible for dorsiflexion (pulling the toes up toward the knee). This is often where people feel shin splits.

These muscles work together to provide stability, support, and movement to the lower extremities during activities such as walking, running, jumping, and squatting.

Related: here are some other quad exercises you can do at home.

Final Note About Glute Workouts

Often, people say they aren’t “activating their glutes” and do muscle activation drills. People say they have dead butt syndrome or glute amnesia. Fake news! Yall, these are made up terms. You might have weak glutes, and you might need to practice doing exercises well, but your muscles do not turn “off” or remain unactivated.

Fire hydrants, abductions, and other glute warm ups don’t magically turn the muscles on. Just practice doing these well, and you’ll progress into strong glutes. Please please don’t fall for “Killer Butt Workout” PZ60 or whatever is popular. Focus on doing great quality movement, not gimmicks.

Glute thrusts, hip bridges, squats and RDLs are some of the best glute exercises, and lower body exercises. Practice these, focusing on feeling your hamstrings stretch and glutes engage, and I promise you’ll start to feel your glutes working better. 

Other Options for Your Leg and Glute Home Workouts

There are so many more leg exercises, and a ton of good glute workouts. You can add in any lunge variations, the curtsy lunge, step ups, pause and tempo squats and lunges, monster walks with bands, etc. With bodyweight workouts, you can get as creative as you’d like! Keep up your strength training, and be consistent with your work.

The human body is amazing! When you keep giving it the right stimulus, you’ll see your fitness goals fall into place. Your everyday life will get easier and you’ll feel stronger. 

Try these exercises for the best dumbbell shoulder workouts at home. Sadly, you can’t do legs everyday!

Work With Me!

If you are looking for a personal trainer in Austin, I’d love to talk with you! If you are not in Austin, Round Rock, or central Texas, let’s talk about online training.

Message me here for a free consult about personal training in Austin, Texas, or here for online personal training, and we’ll discuss your goals, background, equipment availability, schedule, and exercise preferences.

Let’s get you strong and healthy! 💪

About the author

Kathryn Alexander is a strength coach and personal trainer in Austin, Texas. She loves hiking, college football, and the feel of a perfectly knurled barbell. Read more about Kathryn here.


  • cheap fun things to do in Austin. Barton Springs Pool
    Cheap, Fun Things to Do in Austin, Texas (2025)
  • cable squats muscles worked by Kathryn Alexander Austin personal trainer
    Cable Squats: Muscles Worked and How to do Them
  • semi private personal training Austin Texas
    New Semi Private Personal Training in Austin, Texas!
  • The best workouts for healthy Emma Suttie Kathryn Alexander epoch Times
    The Best Workouts for Health: Contributor for Epoch Times
  • dumbbell back workout Kathryn Alexander Austin personal trainer
    Dumbbell Back Workout: The 5 Best Exercises
  • Dumbbell arm workout at home with Kathryn Alexander
    Dumbbell Arm Workout At Home

Filed Under: Home gyms, Training

How Thick Should Gym Flooring Be? A Detailed Guide

March 14, 2024 by Kathryn Alexander

How thick should gym flooring be? When it comes to outfitting your commercial gym, home gym or garage gym, choosing the right thickness for gym flooring is crucial.  This guide covers how thick your gym flooring should be and what floor types are the best for your commercial gym or home gym flooring.

I have worked in many different types of gyms over the 19 years I’ve been training: athletic facilities, strength and conditioning rooms, commercial gyms, racquet clubs, hardcore local gyms, a froo-froo gym I’ll never set foot in again, and my favorite: my garage gym. They all had different flooring and surfaces, and it makes a big difference for the athletes, lifters a​nd coaches.

Let me help you decide what kind of flooring is the best option for you, based on what kind of exercise you do and your workout space.

What Types of Gym Flooring Are Available?

Whether your facility caters to heavy weightlifters, high-intensity interval trainers, or martial artists, the thickness of your gym flooring can make a significant difference in performance, safety, and overall user experience. In this comprehensive guide, we’ll explore various factors to consider when determining the appropriate thickness of gym flooring, including the type of exercises performed, equipment used, and specific needs of your facility.

Understanding Gym Flooring Options

Before delving into thickness considerations, let’s first examine some popular gym flooring options commonly used in commercial spaces:

  1. Rubber Mats:
    • Rubber mats offer excellent durability, shock absorption, and slip resistance, making them an ideal choice for high-impact exercises and heavy weight training areas. They come in various thicknesses ranging from 1/4 inch to 3/4 inch, providing options to suit different needs and preferences.
  2. Rubber Tiles:
    • Rubber tiles are versatile and easy to install, providing a seamless flooring solution for large workout spaces. They come in standard thicknesses ranging from 3/8 inch to 3/4 inch, offering superior impact absorption from hard surfaces, and noise reduction for commercial gyms and exercise rooms.
  3. Rubber Rolls:
    • Rubber rolls provide seamless coverage for larger areas and offer excellent shock absorption and slip resistance. They are available in different thicknesses, typically ranging from 1/4 inch to 3/4 inch, making them suitable for heavy weightlifting areas, power cages, and exercise studios.
  4. Foam Tiles:
    • Foam tiles are lightweight and portable, making them ideal for temporary or portable workout spaces. While they offer some cushioning and support, they are not as durable or resilient as rubber flooring options. Foam tiles typically range in thickness from 3/8 inch to 1 inch, providing options for light to moderate exercise activities.
Turf and rubber flooring at Iron Forge Gym

What to Consider When Determining Gym Flooring Thickness:

  1. Type of Exercises:
    • Consider the primary types of exercises performed in your gym, such as weight training, plyometrics, martial arts, or bodyweight exercises. High-impact exercises like plyometrics and heavy weightlifting require thicker flooring with superior shock absorption to cushion impacts and reduce the risk of injury.
  2. Equipment Usage:
    • Evaluate the type and weight of equipment used in your gym, including free weights, barbells, and weightlifting machines. Thicker flooring is necessary to withstand the impact of heavy equipment and protect the subfloor from damage.
  3. Specific Needs:
    • Assess the specific needs and preferences of your clientele, including their fitness goals, exercise preferences, and injury history. Tailor your gym flooring thickness to accommodate a wide range of activities and user requirements.
  4. Impact Absorption:
    • Prioritize flooring options with excellent impact absorption properties to minimize stress on joints and reduce the risk of injuries, particularly in high-impact exercise areas such as plyometric zones or martial arts studios.
  5. Noise Reduction:
    • Thicker gym flooring can help dampen noise from dropped weights and equipment, creating a quieter and more enjoyable workout environment for gym members and neighboring spaces.
  6. Aesthetics and Durability:
    • Consider the aesthetics of your gym and choose flooring options that complement the overall design and branding of your facility. Additionally, prioritize durable materials that can withstand heavy foot traffic and regular use without compromising performance or appearance.

Choosing the Right Thickness

Now that we’ve explored the various factors to consider let’s delve into how to choose the right thickness for your gym flooring based on specific needs and requirements:

  1. High-Impact Exercises:
    • For areas dedicated to plyometric exercises, martial arts, or high-intensity interval training, opt for thicker rubber flooring ranging from 1/2 inch to 3/4 inch to provide optimal shock absorption and joint protection.
  2. Heavy Weightlifting:
    • In weightlifting areas, power cages, and squat racks, choose rubber flooring with a thickness of at least 1/2 inch to 3/4 inch to withstand the impact of heavy weights and equipment without causing damage to the subfloor.
  3. General Exercise Areas:
    • For general exercise areas used for a variety of activities including strength training, cardio, and bodyweight exercises, opt for rubber flooring with a thickness of 3/8 inch to 1/2 inch to provide adequate cushioning and support for all types of workouts.
  4. Portability and Versatility:
    • If you require portable or temporary flooring solutions for events, classes, or outdoor workouts, consider foam tiles with a thickness of 3/8 inch to 1/2 inch for lightweight and easy-to-install options.
  5. Budget Considerations:
    • While thicker flooring typically offers better shock absorption and durability, it may come at a higher cost. Evaluate your budget constraints and balance the benefits of thicker flooring with your financial limitations.

​Flooring Considerations for Mixed Use Gyms

Gyms can be pretty cookie cutter, like most big box gyms. They have some machines, a circuit station, and some “hand weights” or light weights. Blah. Get me outta there. They can use any kind of typical rubber gym flooring because they don’t typically have squat racks, heavier weights, or Olympic lifting. That’s fine; it works for a lot of people. If it suits your needs, then you are in luck because these gyms are everyone. 

However, please know that local gyms with better equipment, heavier weights and happy happy regulars are great places for everybody! From people who are totally new to a gym to advanced lifters and competitors, these gyms typically have better equipment, and more options for you.

When it comes to flooring, they’ll typically use thick rubber flooring that’s obviously durable enough for commercial use. In some areas, you’ll see deadlift stations with even thicker mats than the typical rubber gym floor mats. This is necessary for heavier lifting. You’ll even see platforms for dedicated heavy deadlifting. 

Platforms are made of layers of plywood and rubber horse stall flooring: some of the thickest mats out there. By screwing these layers of flooring together, the platform dissipates the weight of the heavy lifts to protect the floor. 

Home Gym and Garage Gym Flooring

The best thing about outfitting your home gym is that you get to make it perfectly fit you! As you decide how thick your gym flooring should be, answer the following questions:

  • what kind of exercise, lifting and movement will you do in your space? 
  • will you be deadlifting, clean & jerking, or snatching any weights? 
  • will you have a squat rack? 
  • what other type of equipment will you have? Anything large and heavy?

If you have smaller weights and will not be using barbells, you have many options of flooring thickness. You can use interlocking foam mats, which are thick, foam tiles that interlock like puzzle pieces. They are very versatile, easy to install and remove, and provide cushioning. They don’t need to be nailed down or permanently affixed to the floor. 

If you are going to set up a garage gym and are going to use any kind of barbells or a squat rack, I recommend rubber floor mats. The horse stall mats that are available from Tractor Supply Company are my favorites. The standard thickness of these is 3/4 inch of heavy rubber. This is a good balance of thickness and weight.

how thick should gym flooring be? 1/2 rubber mats pictured here.
How thick should gym flooring be? 1/2 rubber mats pictured here.

They are heavy (94 pounds) especially for one person lifting and installing them. Ask me how I know, lol. I have about 12 of them. They are my favorite gym mats though, and they’re worth the one time struggle of getting them home. 

You can see in this post about heating a garage gym, more details about my stall mats.

One of my clients even installed two in her basement gym in Virginia. They are a great choice to protect her floor from light to heavy use. 

Related: home gyms ideas garage edition! This is a huge guide for what you need for your garage gym!

Considerations for MMA and Martial Arts Gyms

Flooring for martial arts gyms often combines both rubber flooring and a softer flooring on top. One example of this is vinyl or canvas covered foam mats. These mats typically have a high-density foam core with a durable vinyl or canvas cover. They are easy to clean and provide a smooth surface suitable for various martial arts styles.

These two layers allow for insulation from a hard floor, and then further cushioning to reduce the risk of injury during falls or throws. The best thickness for this second layer of foam mat is 1-2 inches. Heavy lifting and weight lifting usually do not occur in this part of the gym, so the best choice is cushioned matting on top of rubber matting. 

Large Commercial Gym Flooring

For a larger area than a home gym or martial arts studio, the best option will be larger rubber floor rolls. In this case, you’ll want to segment your gym into heavy use areas that require thicker rubber floors, MMA and stretching areas, and areas where machines but not free weights are used. This way you can use the above information about which rubber flooring thickness suits your activity best. This can also help your budget. Thicker flooring means more money often, so in some areas, 3/8 rubber flooring rolls are a good thickness to provide safe, non-slip footing and enough cushion from the concrete slab. 

Then, where you have heavy gym equipment, squat racks and bench presses, install 1/2 inch rubber flooring. Finally, for specific deadlift areas, install thick flooring: a platform of plywood and horse stall mat, like I mentioned above. You might even buy a commercial deadlift platform, which typically comes with 8 large rubber pieces inside a metal frame. These are popular options in gyms with powerlifting competitors. 

Layers of a platform: rubber and plywood. Gym flooring.
Layers of a platform: rubber and plywood for this platform at Big Tex Gym, one of the best gyms in Austin.

Of course, all of these depend on your gym’s usage and budget. Just know that it will be worth it to make dedicated spaces so you are able to both protect your floor and give your lifters the best experience possible. 

Lastly, I LOVE me a good turf in a gym! If you have the space, this will set your gym apart from the others in town. Gym turf rolls are available to fit your specific square footage. They are fabulous for sled work, strongman training, and athletic movements. I highly highly recommend turf in a gym! It will set you apart from a general fitness studio, and establish your space as a lifting facility. 

How Thick Should Gym Flooring Be? 

As you can see, “how thick should gym flooring be?” is a great question! Selecting the right thickness for gym flooring is essential for creating a safe, comfortable, and functional workout environment in commercial gyms and fitness studios. By considering factors such as the type of exercises performed, equipment used, specific needs of your facility, and budget constraints, you can determine the ideal thickness of gym flooring to meet the requirements of your clientele.

Whether you opt for rubber mats, tiles, rolls, or foam tiles, prioritize impact absorption, durability, and user comfort to ensure optimal performance and satisfaction for gym members and coaches alike. 

Message me if you have anymore questions! I love this stuff! 🙂

Gym flooring. Kathryn Alexander deadlifting on platform at Sorinex.

About the author

Kathryn Alexander is a strength coach and personal trainer in Austin, Texas. She loves hiking, college football, and the feel of a perfectly knurled barbell. Read more about Kathryn here.


  • cheap fun things to do in Austin. Barton Springs Pool
    Cheap, Fun Things to Do in Austin, Texas (2025)
  • cable squats muscles worked by Kathryn Alexander Austin personal trainer
    Cable Squats: Muscles Worked and How to do Them
  • semi private personal training Austin Texas
    New Semi Private Personal Training in Austin, Texas!
  • The best workouts for healthy Emma Suttie Kathryn Alexander epoch Times
    The Best Workouts for Health: Contributor for Epoch Times
  • dumbbell back workout Kathryn Alexander Austin personal trainer
    Dumbbell Back Workout: The 5 Best Exercises
  • Dumbbell arm workout at home with Kathryn Alexander
    Dumbbell Arm Workout At Home

Filed Under: Home gyms

Bushing vs Bearing Barbell: What’s the Difference?

February 28, 2024 by Kathryn Alexander

Bushing vs bearing barbells: what is the difference, and which is right for you? 

One of my favorite things about independent and not big-box gyms is that many of the lifters who go to these gyms have a really high lifting iq. They understand that good equipment can help them with their training, and they spend the time researching, and the money buying good equipment. 

A great example of this is barbells. Most people just grab a barbell at whatever gym they go in. This is just fine if it suits you! But, when you start to realize how many specialty bars there are out there, and how they can help your training, it gets really fun! 

bushing vs bearing barbell. Austin personal trainer Kathryn Alexander explains which is best for you.
Pictured above is the Rogue Ohio Deadlift Bar, the Kabuki Squat Bar, and the Original Texas Power Bar. These are all bushing bars. The Texas Power Bar is my favorite, and it’s the first bar I saved up for and bought.

There are Olympic bars, squat bars, deadlift bars, power bars for the bench press, squat and deadlift. The Olympic bars are for the clean & jerk and snatch, and some accessory lifts like front squats, hang cleans, power cleans, etc.

Does it really matter to you whether you use a power bar or Olympic barbells, and what is inside the mechanics or your bar? Maybe! It depends on your goals, so let’s discuss and see what works for you! 

Bushing vs Bearing Barbells: What are the Main Differences?

When it comes to selecting the right barbell for your strength training regimen, understanding the differences between bushing and bearing barbells is essential. Both types of barbells have their own unique characteristics and advantages, making them suitable for different applications and preferences.

In this comprehensive guide, we’ll delve into the main differences between bushing vs bearing barbells, explore their respective features and main differences, and help you determine which option is best suited for your specific needs.

Pre garage gym renovation, as you can tell. The bar resting against the wall is my first bar, a nice basic bushing barbell. The bar loaded is a bushing barbell too, but is a Texas Power Bar, a step up from my first one.

Bushings, known for their robustness and versatility, cater to a wide range of lifts, making them suitable for powerlifting and general strength training. On the flip side, bearings offer a smoother spin, crucial for the explosive movements found in Olympic lifting.

Each rotation system comes with its own set of advantages, and understanding these can significantly influence which barbell suits your lifting goals. Whether it’s hoisting heavy loads with precision or executing faster lifts, the choice between a bushing and bearing barbell could be the key to unlocking your best lift yet. 

Bushing Barbells

Bushing barbells are equipped with bronze or composite bushings located between the bar shaft and the sleeve bearings. These bushings act as friction-reducing components, allowing the sleeves to rotate smoothly during lifts. Here are some key features and characteristics of bushing barbells:

  1. Friction Reduction: Bronze bushings provide a low-friction surface between the bar shaft and the sleeves, resulting in a smooth rotation system ideal for slower lifts and strength training exercises such as bench presses and squatting.
  2. Corrosion Resistance: Bushing barbells with bronze bushings offer excellent corrosion resistance, making them suitable for use in humid environments or outdoor settings where exposure to moisture is a concern.
  3. Durability: Bronze bushings are known for their durability and long service life, capable of withstanding heavy loads and regular use without compromising performance or structural integrity.
  4. Cost-Effectiveness: Bushing barbells are generally more affordable than bearing barbells, making them a popular choice among home gym owners, beginners, and budget-conscious individuals looking for quality bars without breaking the bank.

Bushing Barbells

Bearing barbells utilize high-quality ball or needle bearings located within the sleeves to facilitate smooth rotation and faster spins during Olympic lifts and dynamic exercises. Here are some key features and characteristics of bearing barbells:

  1. Smooth Rotation: Ball bearings or needle bearings offer superior spin and rotation, allowing for faster and more fluid movements during dynamic exercises such as Olympic lifts, power cleans, and snatches.
  2. High Load Capacity: Bearing barbells are designed to handle heavier loads and high-speed lifts, making them the preferred choice for competitive weightlifters, Olympic lifters, and athletes who demand optimal performance and precision.
  3. Reduced Friction: The use of ball or needle bearings minimizes friction between the bar shaft and the sleeves, resulting in a smoother spin and enhanced overall performance, particularly during high-speed lifts and rapid transitions between exercises.
  4. Precision Engineering: Bearing barbells are engineered to exacting standards, with precision-machined components and high-quality materials such as stainless steel for optimal durability, tensile strength, and corrosion resistance.

Key Differences:

  1. Rotation System: Bushing barbells utilize bronze or composite bushings for friction reduction, while bearing barbells employ ball or needle bearings for smooth rotation and faster spins.
  2. Application: Bushing barbells are well-suited for slower lifts, strength training exercises, and general fitness workouts, whereas bearing barbells excel in Olympic lifting, dynamic movements, and high-speed lifts requiring precision and control.
  3. Cost: Bushing barbells are typically more affordable than bearing barbells, making them a practical choice for home gym owners and budget-conscious individuals. Bearing barbells, on the other hand, are considered premium options and may come with a higher price tag due to their advanced bearing systems and precision engineering.
  4. Maintenance: Bushing barbells require minimal maintenance and upkeep, with bronze bushings offering excellent durability and corrosion resistance. Bearing barbells may require periodic lubrication and maintenance to ensure smooth operation and prolong service life, especially under heavy loads and high-speed conditions.

Other Differences in Specialty Bars

One main difference in an Olympic weightlifting bar, which is typically a bearing barbell, is that it doesn’t have the center knurling. This is because the bar is often used to perform cleans, which end up at the lifters neck and collarbone area. An aggressive knurl in that area will be abrasive and uncomfortable against skin. Center knurling is found on power bars, so that the barbell can have a more secure grip on the lifter’s shirt or back. 

If you’re looking for a total gym enthusiast to help design your program, let’s do a free consult about online training for you. We’ll use every fun bar there is!

Another potential difference is that a squat bar is 32 mm, making it a big thicker than a standard 29 mm bar. This allows the bar to sit on the neck better, and allows it to handle as much weight as the heaviest squatters in the world need. A heavy squat bar needs to be very very strong, but doesn’t need to have a very fast spin. Squat bars are also typically 55 pounds instead of the standard 45. Most standard barbells weight 45 pounds, but specialty bars vary.

Deadlift bars have a smaller grip than standard bars, at 27 mm. The end of the sleeves on deadlift bars are often longer so they can accommodate more plates, and have a little more whip. This means they break the ground easier, as they bend more. 

These differences are a little more about the specific application of the bar than the type of bearing, but it will still play into your decision of what kind of barbell to use. There is also a hybrid bar, which is typically a bushing bar.

Premium Picks: Top Recommended Bearing Barbells

For those of you diving deep into the world of Olympic lifting, the question of whether you should use a bushing vs bearing barbell is easily answered: you’ll find yourself practicing with bearing barbells. These barbells stand out, particularly for their smooth rotation and fast spin, catering flawlessly to the high speeds and heavy loads of Olympic lifts. Bearing barbells are used by the International Weightlifting Federation. 

Among the elite, certain brands have established themselves as the go-to options. American Barbell and Eleiko (now located in Austin, Texas!), with their premium bearing systems, are unparalleled in precision. They ensure a smoother spin under duress, thanks to the high-quality needle bearings that define their construction. Furthermore, these barbells often come equipped with dust seals, an ingenious addition that prevents dirt and debris from compromising the barbell’s integrity. This feature, along with their robust stainless steel build, assures that with the right care, these barbells will remain your loyal companions on your path to Olympic lifting mastery. 

Maintenance 101: Protecting Your Barbell Investment

Maintaining your barbell, be it a bearing or a bushing model, is like ensuring your vehicle runs smoothly by regularly checking its oil. For those of us invested in weightlifting, our barbells are invaluable tools, and their upkeep is crucial for their longevity and our performance. You might wonder why this is so essential.

The answer is simple: the smoother the rotation system, whether it’s bushing or bearing, the more secure and efficient your lifts will be. Dust, rust, or degradation of parts can significantly impede this smoothness, especially under heavy loads or during fast, explosive Olympic lifts. 

Here are a few maintenance tips to keep in mind:

  • Regular cleaning: Wipe down your barbell after each use to prevent build-up of sweat, dust, or chalk. For those with steel barbells, this step is crucial to fend off corrosion. 
  • Lubrication: Apply a suitable lubricant to the bearings or bushings periodically. This ensures a consistently smooth spin, essential for lifts like the snatch or clean and jerk. 
  • Proper storage: Never leave your barbell loaded with weight plates on the rack, as this can bend the bar over time. Instead, store it horizontally on a rack or, even better, in a vertical barbell holder to minimize dust accumulation on the sleeves. 

By taking these simple steps, you ensure your barbell, whether bushing vs bearing barbell, remains a faithful tool in your strength training journey. A well-maintained barbell not only performs better but also significantly reduces the risk of injury during your lifts. Invest in your equipment’s maintenance, and it will surely return the favor in gains. 

Durability-wise, both types boast long service lives, but bushings edge out with fewer moving parts and, consequently, a sturdier build over time. So, when it boils down to making the right choice for your lifting, whether it’s the dense atmosphere of a bustling gym or the quiet focus of a home gym, you must weigh these key differences.

Consider not just the lifts you’re currently performing but also those you aim to conquer. Whether your journey leans towards the steadfast endurance of powerlifting or the dynamic fury of Olympic lifting, choosing the appropriate barbell—bushing or bearing— could very well be the pivot on which your lifting success swivels.

Choose the Best Barbell For You

When it comes to choosing between a bushing vs bearing barbell, understanding the key differences and considering your specific needs and preferences is essential. Bushing barbells offer reliable performance, durability, and affordability, making them suitable for a wide range of strength training exercises and applications. Bearing bars have greater barbell spin but are a greater investment. 

If building out your home gym isn’t a priority right now, and you are in Central Texas, check out the best gyms in Austin, where you can use all these bars.

For us focusing on heavy loads, slow lifts, or just building foundational strength, they offer the perfect blend of performance and durability. 

Bearing barbells, on the other hand, provide superior spin, precision, and performance, making them the preferred choice for competitive weightlifters, Olympic athletes, and individuals seeking optimal performance and speed during dynamic lifts. 

Whether you’re a beginner, an experienced lifter, or a competitive athlete, selecting the appropriate type of bushing vs bearing barbell can enhance your training experience and help you achieve your fitness goals more effectively.

If you have specific questions about a bushing vs bearing barbell, including barbells that aren’t even in this article, please email me! I’d love to hear what you’re training with and your questions/comments. Kathryn (at) kathrynalexander.com

Here are some fun home gym organization ideas to make your space more effective and fun for your training!


About the author

Kathryn Alexander is a strength coach and personal trainer in Austin, Texas. She loves hiking, college football, and the feel of a perfectly knurled barbell. Read more about Kathryn here.


  • cheap fun things to do in Austin. Barton Springs Pool
    Cheap, Fun Things to Do in Austin, Texas (2025)
  • cable squats muscles worked by Kathryn Alexander Austin personal trainer
    Cable Squats: Muscles Worked and How to do Them
  • semi private personal training Austin Texas
    New Semi Private Personal Training in Austin, Texas!
  • The best workouts for healthy Emma Suttie Kathryn Alexander epoch Times
    The Best Workouts for Health: Contributor for Epoch Times
  • dumbbell back workout Kathryn Alexander Austin personal trainer
    Dumbbell Back Workout: The 5 Best Exercises
  • Dumbbell arm workout at home with Kathryn Alexander
    Dumbbell Arm Workout At Home

Filed Under: Home gyms, Misc.

Home Gym Organization Ideas and Best Storage Solutions

February 19, 2024 by Kathryn Alexander

If you need home gym organization ideas, storage solutions, equipment suggestions, or are just in the planning process, I am so excited for you! There are so many ways to create an organized and well running home gym that’s perfect for you.

Creating a home gym or garage gym for your training in the comfort of your own home can be transformative for both your physical and mental well-being, and I highly recommend it for everybody. 

Whether you have a small space or an entire garage, I urge you to get started on your home gym. Crucial to this process is impeccable organization. Organizing your home gym is one of the most fun processes, and keeps it running smoothly. Building out your home gym or garage gym might seem daunting at first, but you can do it!

Home gym organization ideas Kathryn Alexander personal trainer Austin

Whether your gym occupies a tiny corner of your living room, spreads out across a spare room, or even commandeers your whole entire garage, the principles of effective organization remain the same.

It’s all about making your space work for you, ensuring every band, plate and bar has it’s place. The peace of mind that comes from stepping into a well-organized training space is unmatched, allowing you to focus solely on your strength and conditioning and fitness goals. 

Key Takeaways:

  • Home gym organization: Essential for efficient and enjoyable workouts. 
  • Adaptability: Strategies to fit every space, from limited to expansive. 
  • Personalized setup: Tailored to support your individual strength and fitness goals. 

Assess Your Space and Needs

Take a moment to assess your needs and your space, and fit them together. How much room are you going to allocate to your home gym? It can be a spare room, a corner of the living room, or you can go crazy and fill up your garage. Highly recommended 🙂

Do you need guidance on what to buy to start your home gym? Here’s the equipment in my short list of home gym essentials.

Now let’s discuss your training goals. If you are going to be training with dumbbells, barbells and weight plates, you’ll obviously need the room both for the exercises and the storage. 

If you are a yoga or Pilates enthusiast, or will primarily be doing mobility and stretching, you probably won’t have a ton of home gym equipment. You can get away with using a small space for your home sessions. 

It’s about making your space work for you, ensuring every jump rope, dumbbell and medicine ball has its place, making way for killer training sessions at home.

Peg board for garage gym or home gym storage

Declutter Your Space

Clutter is one of the biggest challenges of a home gym. We could all use more space, and it’s really tough to stop buying things for your home gym! 

When your home gym is cluttered, it hinders not just your physical movement but also your mental clarity. I’ve seen it – equipment scattered everywhere, from resistance bands tangled in a messy heap, foam rollers and yoga mats awkwardly flopped against a wall, to free weights hidden under a pile of jump ropes. The solution? Decluttering. 

  • Assess Your Equipment: Take a good, hard look at what you have. This is the hardest part for me. Other people will tell you to be ruthless about what you use and don’t. I have trouble with that because I do like collecting things if they can be valuable to my training. So, I focus on the next step: maximizing storage space.
  • Maximize Storage Space: Employ smart storage solutions. Wall-mounted racks are great for bars and even plate storage. I have a giant peg board that has hooks for hanging yoga mats and resistance bands, hip circles, and wraps and straps, freeing up valuable floor space. For heavier items like weight plates and kettlebells, consider sturdy shelves or cabinets that can bear the load. 

Smart Storage Solutions

My favorite home gym organization tip is to get stuff off the floor! Use wall storage, use the storage pegs on your power cage if you have one. Use shelving. All these things keep the floor clear, offering space for the versatility of your sessions. 

Since you probably don’t have the square footage of a large commercial gym, you will be using your free space for many different exercises, instead of dedicated equipment. When you have your equipment stored on the walls, this space will be a God send!

Utilize Wall-Mounted Racks and Hooks

Employing wall-mounted racks and hooks is a game-changer, especially for those of us with limited space. These ingenious storage options perfectly cater to hanging resistance bands, neatly storing foam rollers, and keeping jump ropes tangle-free.

The beauty of this approach lies in its impact on freeing up valuable floor space. Suddenly, that small workout space in your spare room or even a corner of your living room transforms into an open area, ready for you to execute your exercise routine without the hassle of navigating through clutter.

This brilliant use of vertical space not only makes your fitness equipment easily accessible but also contributes to a more organized and inviting exercise space, motivating you to keep up with your home workouts in the privacy of your home gym. 

Peg Board Garage Gym Storage

Hands down, the best thing I did for my garage gym organization is getting a peg board. I got this from U-Line and they delivered it in like 2 days. Not an ad. It is actually rated to hold quite a bit more weight than I use it for, but it holds so many little things that used to just get lost in in gym. 

I have bench press wraps, wrist wraps, lifting straps, knee sleeves, bands, jump rope and even an Iron Neck on my peg board. I also put my weight belts and longer resistance bands on the peg board so that they aren’t piled up on the floor. Don’t forget your TRX, blast straps, or any other rings or suspension systems too.

The only thing I don’t store on my peg board is medicine balls and dumbbells. Though it could hold it, I know it could. 

To reiterate, I LOVE how much storage this thing gives me! It is probably my best home gym organization idea. Highly recommend.

Kathryn Alexander peg board garage gym organization

Innovative Floor and Ceiling Storage

Every inch of space counts, especially when we’re working with areas like a cozy living room corner, a part of your garage gym, or even a dedicated spare room. This is where getting creative with floor and ceiling storage solutions truly shines. Floor racks are an absolute game-changer for heavy hitters like free weights and barbells, neatly corralling them in one accessible spot. 

While we are on the topic of flooring, read here for a comprehensive guide on how thick your gym flooring should be.

Home Gym organization ideas and storage solutions

By going vertical, you not only safeguard your valuable floor space for actual workouts but also keep essential gear like foam rollers and jump ropes within arm’s reach for easy access. It’s about smartly leveraging every nook and cranny to maintain a streamlined, motivating exercise space. A well-organized gym is your best friend in your fitness journey, making it easier for you to stay focused and committed. 

Home Gym Ideas Garage Edition! A comprehensive guide here!

The Rolling Cart: A Versatile Organizer

A rolling cart is a fantastic and convenient organizer. These can be either movable shelves with sheets, or plate storage on wheels. 

A rolling cart with flat storage shelves dynamic solution for keeping all those smaller items – think resistance bands, yoga mats, jump ropes, and even the foam rollers – neatly organized and within arm’s reach during a sweat session. Imagine this: no more pausing your workout to dig through a cluttered pile for your gear. With everything sorted on a rolling cart, you can easily wheel your essentials right to your side, ensuring those accessories are always just where you need them, when you need them. 

Rolling storage racks for weight plates

The best part? Rolling all the heavy plates to where you need them instead of lugging them over one by one. When it’s time to reclaim your space, simply roll the cart away. Talk about a game-changer for home gyms of any size!

Budget-Friendly Home Gym Organization Ideas

Organizing a home gym space doesn’t have to cost your whole budget. Thinking outside the box can help you find solutions that cater to your specific needs without overcrowding your space or emptying your wallet. For instance, like I mentioned, the one peg board on the wall offers a versatile way to hang resistance bands, jump ropes, and even yoga mats, freeing up valuable floor space and keeping your workout area clutter-free. 

Another great option is repurposing an old bookshelf or rolling cart to neatly store smaller items like ankle weights, foam rollers, and water bottles, ensuring quick access during your workout sessions.

For those with limited space, utilizing vertical space by installing wall-mounted racks can be a game-changer, perfect for hanging exercise equipment and saving room for those intense workout sessions. The best home gym storage ideas are those that reflect your lifestyle and help maintain the privacy of a home gym, turning even a small area into an open, inviting exercise space. 

Shelf storage of kettlebells in home gym

Barbell Storage

Barbells are an essential part of a home gym, if you are looking to completely replace your gym memberships. Barbells don’t take up much space, but they are usually a significant investment so you want them to be stored safely. There are many different sizes of barbells, but a standard barbell is 45 pounds and about 7 feet.

A great way to store many barbells is a gun storage style barbell holder. These storage racks use wall space to hold your barbell babies. I am going to build one of these this summer, so be on the lookout for updates. 

In the meantime, I store two of my barbells vertically. Two I store horizontally. One lives on the ground, so I need up give that one a better home. Stay tuned.

Horizontal and vertical barbell storage at Big Tex Gym in Austin, Texas

Personalizing Your Home Gym

Now here’s the next fun part: you get to make your home gym truly your own!  You get to put up your own pictures, medals, trophies, and poster. You can choose the lighting and the theme and ambiance. I end up collecting things little by little. The idea of creating a whole space is overwhelming to me, so I’ve ended letting my garage gym just turn into itself over the years. 

I have a few posters I like, some sports memorabilia (GEAUX TIGERS! HOOK ‘EM!) SEC, baby. I have some books I like, especially books about the golden era of bodybuilding and lifting. 

And, remember you get to be the sole DJ. You pick the music and get your mind right. These are just a few of the benefits of a home gym.

Is it still cold where you are? It’s chilly in Austin. Here’s the best ways to heat a garage gym.

Home Gym Organization Ideas: The Final Stretch

An enjoyable and well used home gym relies on organization. That’s the fine line between a frustrating session searching for the tools and weights you need, and a seamless training session that goes the way you plan. 

Organizing your home gym isn’t just about aesthetics; it’s the fine line that separates a frustrating session searching for a specific dumbbell or the perfect resistance band, from a seamless transition into your strength training or home leg workouts or mobility sequence. I’ve seen my own transformation, moving from cluttered chaos to a streamlined fitness setup, and the difference is night and day. 

Don’t let the value of your investments in fitness equipment degrade under a pile of clutter. Your equipment deserves it’s proper place. 

Take this moment to reevaluate your space and create a space where your training will thrive. Let the transformation begin not just in your physical environment but in your mindset. The leap from cluttered to clear, from haphazard to harmonious, will reap dividends not only in the clarity of your physical space but in the clarity of your mind during each workout. The final stretch? It’s realizing that the power to maximize your workout through innovative organization was in your hands all along.

Personal Training in Austin and Beyond

I’d love to help you with your personal training, and your home or garage gym. I have used so much equipment and built many garage gyms for different people’s needs. If you’d like to do a free consult about your training or equipment, contact me here.

Other Personal Training Resources

All Your Personal Training Options Explained

Personal Training in Austin and Round Rock, Texas


About the author

Kathryn Alexander is a strength coach and personal trainer in Austin, Texas. She loves hiking, college football, and the feel of a perfectly knurled barbell. Read more about Kathryn here.


  • cheap fun things to do in Austin. Barton Springs Pool
    Cheap, Fun Things to Do in Austin, Texas (2025)
  • cable squats muscles worked by Kathryn Alexander Austin personal trainer
    Cable Squats: Muscles Worked and How to do Them
  • semi private personal training Austin Texas
    New Semi Private Personal Training in Austin, Texas!
  • The best workouts for healthy Emma Suttie Kathryn Alexander epoch Times
    The Best Workouts for Health: Contributor for Epoch Times
  • dumbbell back workout Kathryn Alexander Austin personal trainer
    Dumbbell Back Workout: The 5 Best Exercises
  • Dumbbell arm workout at home with Kathryn Alexander
    Dumbbell Arm Workout At Home

Filed Under: Home gyms

Home Gym Essentials

July 11, 2023 by Kathryn Alexander

What are your home gym essentials? My bare minimum recommendation is two pairs of dumbbells, a heavy dumbbell or kettlebell, and a couple bands. I’ll give you specifics below.

Equipment for Your Home Gym

Home gyms have been growing in popularity, and for great reason! Even if you continue to go to fully equipped gyms, it’s a fantastic idea to have some of your own equipment at home. Might be raining so hard, traffic might be crazy. Whatever the reason, keeping some equipment at home gives you options.

Related: how to heat a garage gym in the winter

People have been building home gyms from basic, bare minimum style to fully equipped, built out garages for some time now. Most people fall somewhere in between having absolutely no equipment and having pallets delivered to their driveway.

With just a little bit of equipment, you can get good training. Read here how to get a full body push pull squat training session.

How Much Equipment Do You Need?

Take into consideration your budget, your space, and your needs. I highly recommend having a dedicated space where you can focus solely on your training regardless of how minimalist your set up is.

The Bare Minimum

At a minimum, I’d like to see you have:

  • a light pair of dumbbells
  • a medium pair of dumbbells
  • one heavy-ish weight (dumbbell or kettlebell will do)
  • a band, maybe two

With these, you can do many exercises to keep you conditioned. You’ll miss out on the benefits of heavy lifting without having a heavy weight, but this basic combination can keep you building muscle and building your health for a long time.

The designations of light, medium and heavy will be different for everybody. I recommend your light bells to be 2-5 pounds and your medium bells to be 8-15 pounds. Email me if you’d like specific recommendations. kathryn@kathrynalexander.com

The above links are affiliate links to products & brands I actually use, which may make me a small commission at no extra cost to you.

The Next Level

If you’re ready to invest a little more, buy one heavy dumbbell or kettlebell, and a hip circle. These should not be prohibitively expensive and give you more options to build strength. Your heavy implement can be 30+ pounds in most cases. A kettlebell is easier to hold on to, but is usually more expensive than a dumbbell. Your choice.

Where to Buy Your Equipment

Remember that weight equipment just needs to allow you to work. It doesn’t have to match and it doesn’t have to be fancy. If you have a resale shop like Play It Again Sports in your town, make that your first stop. Amazon has tons of options too. Some of my clients have had luck at Target and Wal-Mart online. Now is a good time to be checking Craigslist too.

My favorite hip circle, the blue band is typically used on the lower body. My favorite one is Mark Bell’s which you can find here. This is an affiliate link to the exact hip circle I have bought many of.

Finally, I order my resistance bands on Amazon. (This is an affiliate link to the band I use. If you purchase through this link, I may make a small commission at no extra cost to you.) You can find these in stores too if you’d like to put hands on them before buying.

Here are my favorite home gym organization ideas, and here is a definitive guide on how to select your gym flooring.

What Do I Do With These Weights?

If you are comfortable designing your own training, then you are now off to the races! If you would like guidance, you can do a week free of The Home Team, my training program for people who are exercising at home. This will give you a good taste of how to structure a week of training and get you started. If it works for you, you can continue from there. If you’d like to continue on your own, you’re off to a great start!

If you’re looking for a one off session and not a whole program, try this full body band workout at home.

If you’re in the market for a barbell and are looking for guidance on which to buy, check out this post on bushing vs bearing barbells.

Enjoy! Tag me in pictures of your home set up (@alexanderkma on Instagram), or let me know how you’ve set up your home gym!

Happy training!

Check out this list of best fitness places in North Austin.


About the author

Kathryn Alexander is a strength coach and personal trainer in Austin, Texas. She loves hiking, college football, and the feel of a perfectly knurled barbell. Read more about Kathryn here.


  • cheap fun things to do in Austin. Barton Springs Pool
    Cheap, Fun Things to Do in Austin, Texas (2025)
  • cable squats muscles worked by Kathryn Alexander Austin personal trainer
    Cable Squats: Muscles Worked and How to do Them
  • semi private personal training Austin Texas
    New Semi Private Personal Training in Austin, Texas!
  • The best workouts for healthy Emma Suttie Kathryn Alexander epoch Times
    The Best Workouts for Health: Contributor for Epoch Times
  • dumbbell back workout Kathryn Alexander Austin personal trainer
    Dumbbell Back Workout: The 5 Best Exercises
  • Dumbbell arm workout at home with Kathryn Alexander
    Dumbbell Arm Workout At Home

Filed Under: Home gyms Tagged With: home gym, The Home Team

Top 10 Benefits of a Home Gym

May 4, 2021 by Kathryn Alexander

The benefits of having a home gym are fantastic on your weight training routine and fitness goals. I know I sound like a broken record, but I have to tell you how strongly I feel about building out your own home gym. You might use it religiously, or it might be a supplement to your training in a commercial gym. Either way, you set yourself up for success when you have everything you need available to you in your own personal home gym.

I cannot overstate how building out a home gym will reinvigorate your training and bring you closer to your goals. It is SO fun and it is one of the best ways to enjoy putting a lot of time (or a little time) into your exercise routine. 

home gym benefits; squat rack of Alexander Training, personal trainer in Austin, Texas

Benefits of a Home Gym

I will cover these in greater detail below, but in a nutshell, here are some benefits of a home gym:

  • ease of use because of lowered psychological barrier 
  • saves time
  • saves money*
  • no sharing equipment
  • no one else’s sweat!
  • you get to pick the music
  • you are entirely responsible for your pace (work:rest ratios)
  • no gym manager oversight
  • you can try weird exercises!
  • you can maintain your equipment

Read also how to heat your garage gym this winter.

Ease of Use

Your home gym will become easier to use because of lowered psychological barrier of time, traffic, commute, etc. Some days a quick 20 minute HIIT session is what your body needs, and it’s hard to justify the commute time to do 20 minutes. Other days you’ll want an hour or 45-minute workout, and with your home gym setup and your own schedule, you can do it as quickly as you need.

It’s worth it, and easy to commit to when you have easy access. It’s literally right there. 

When exercise is easier to do and there are fewer barriers in the way, it’s more likely you’ll stick to a regular exercise routine. If having in-home training makes you more consistent in your fitness routine, then it’s absolutely the right choice. 

home gym benefits
The benefits of a home gym!

Home Gyms Save Time

As mentioned above, a home gym will save commute time, and wear and tear on your vehicle. You won’t get caught in gym chit-chat (for better or worse, because many times those are great chit-chats).

When life gets busy and your schedule is in a pinch, it’s a huge plus to have gym equipment close. This allows you to have complete control over your workout routine. Slash the travel time and see how much time you are able to devote to your strength training when your equipment is in the comfort of your own home. 

Saves Money *

I really love gyms, so I usually end up paying a monthly gym membership or two. BUT over time, you can potentially see some cost savings from not having membership fees. Of course, your home gym equipment will be available to your family members too. Maintaining memberships for the whole family is one thing that quickly drives up the cost of gym memberships. You might* save money if you let go of your monthly gym fee.

*The caveat here is that if you fall in love with building out your dream gym, it miiiight not save you money in the long run. You can always make a small dedicated space in a spare room in your house and begin with some free weights, a yoga mat, and resistance bands. Here is what I consider a minimal viable investment in fitness equipment for a home gym. 

Pretty soon though, you might get the itch to get your own squat rack, plates, and specialty bars. I can’t even discourage you. It’s the most fun way to spend a lot of money; even more fun than buying shoes! It’s also one of the best investments you’ll make in prioritizing your physical fitness and healthy lifestyle.

No Sharing Equipment

Whether you are a germ phobe or not, there are definite benefits to having your own space and your own equipment. A traditional gym will have a ton of equipment, yes, but I feel like I can get anything that I need done with my power rack and a couple barbells.

Since I don’t have to share, a small space is plenty sufficient. I can put my gym bag anywhere, I can use as much chalk as I want, and I know no matter what I’ll get a good workout. 

Plus, there’s no mess unless you made it. Here are my best tips on how to organize your home or garage gym.

No One Else’s Sweat

One of my favorite things about a public gym is that it’s a great way to meet people. They usually have a fun assortment of personal trainers and regulars, all of whom you can learn from. There are the water cooler talks in the locker room and by the bench press, and a community of fitness enthusiasts is a pretty fun addition to your daily life.

A public gym is still public, and that means other people’s sweat. Ew. Home gym owners can at least sweat in the comfort of their own home lol

You Get to Pick the Music

What you enjoy listening to is probably not what the training staff has to guess is palatable enough for everybody. It took me time to recover from hearing it a trillion times, but I’ll always have a soft spot for Rihanna’s Please Don’t Stop the Music (holla, Gold’s Gym 2007 staff & friends!). When it’s your gym and your rules, play what fires you up at whatever volume you want! This is actually a pretty fantastic home gym benefit.

You Are Responsible for Your Pace

I appreciate the spirit of cooperation, and it often works out beautifully that people with specific needs on a specific exercise program share equipment in the gym. However, when you have a plan, it’s not fun to have to wait for someone who is doing one set per 15 minutes on the one functioning piece of equipment you need, not re-racking weights between, and generally taking a ton of time between work sets. When you are dedicated enough that you are working on a specific pace to induce a specific adaptation, the inconsiderate gym hogs can really slow you down.

With your home workouts in your own workout space, you can work on your specific goals at your own pace. Morning person, night owl, fast trainer or slow enjoyer – setting your own pace is one of the best parts of having your own gym.

No Gym Manager Oversight

Most gym managers and owners are pretty cool, but they do get to set the tone. The ones that do it right can make a local gym the most fun, supportive environment in the world.  If they are off a little bit in a way that changes your mojo, that can really affect your training. If you are ready to call all the shots, you need your own place.

You Can Try Weird Exercises!

If you are always learning and always trying new things, it’s nice to have your own space to do so. Nothing’s wrong with going off the beaten path, but sometimes it’s more enjoyable to explore your training style without an audience. Doing a weird type of exercise or type of workout is just something I prefer to do at home. Similarly, I like going for PR’s without an audience. I do better when I know it’s me and only me. Having a lot of people around distracts me. I know I need to work on this, but having my own training environment is the perfect solution for me.

You Can Maintain Your Equipment

This might be the best part of having your own home gym. It hurts my heart every time I see someone abusing or mistreating gym equipment. You can bet that doesn’t happen at my home. You get to make sure your bars are straight, your plates face the right way (you know what I mean), shoes and feet are kept off your equipment, and your bench upholstery doesn’t get torn up. I can keep my equipment on a schedule of regular maintenance and cleaning. Respecting exercise equipment is a very important aspect of learning gym etiquette, and I love knowing that my own gym equipment is taken care of. 

Start Your Home Gym!

Whether you continue your fitness journey with bodyweight workouts in your spare bedroom, or you take it next level and full up your garage with home gym machines, I encourage you to start your own home gym. It is one of the best long term investments you can make in reaching your health and fitness goals. 

If I can help you get start with your own home gym, let me know! Remember it doesn’t have to be fully stocked to start. You don’t have to have anything fancy like a smart gym, expensive bumper plates or adjustable dumbbells. You can start with a pair or two of dumbbells or a band. If you need help decided what to start with, check out my suggestions for home gym essentials here:

Home Gym Essentials

Related: IF a home gym is not for you, or you just can’t pick… check out the best gyms in Austin. 🙂

Happy Training!

Try the first week of The Home Team training, free. You can do this whole workout program at your home gym!


About the author

Kathryn Alexander is a strength coach and personal trainer in Austin, Texas. She loves hiking, college football, and the feel of a perfectly knurled barbell. Read more about Kathryn here.

Filed Under: Home gyms Tagged With: home gym

Primary Sidebar

Kathryn Alexander, personal trainer in Austin
Hi, and welcome here! -Kathryn

Did you know I make custom training plans? Tell Me More!

Recent Posts

  • Cheap, Fun Things to Do in Austin, Texas (2025)
  • Cable Squats: Muscles Worked and How to do Them
  • New Semi Private Personal Training in Austin, Texas!
  • The Best Workouts for Health: Contributor for Epoch Times
  • Dumbbell Back Workout: The 5 Best Exercises

Footer

Follow

  • Email
  • Instagram
  • YouTube

Affiliate disclaimer

As an Amazon Associate I earn from qualifying purchases.

Newsletter sign up

  • Home
  • About Kathryn Alexander
  • Blog
  • Success Stories
  • Training Programs
  • Start Today

Copyright © 2025 · Genesis Sample on Genesis Framework · WordPress · Log in

  • Featured In
  • Privacy Policy
  • Resources
  • Online Personal Training
  • Personal Training
  • Training Programs